
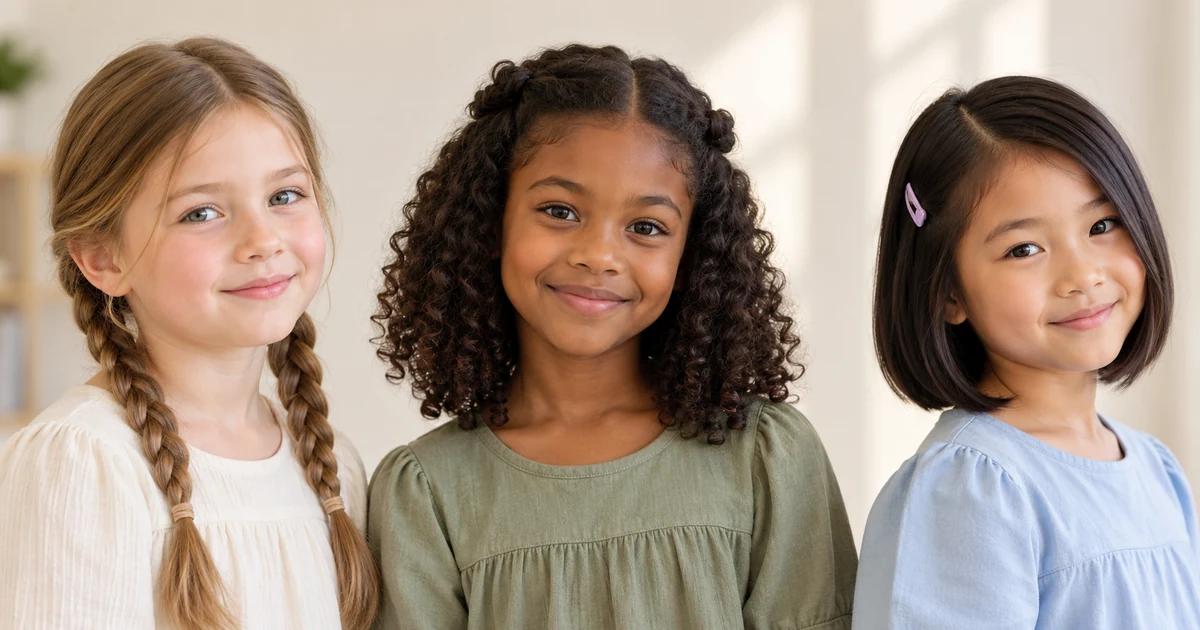
Picture day always seems to land on a morning when the missing shoe and unfinished breakfast need your attention, too. Hair should be one of the easier parts of getting out the door.
These picture day hairstyles for kids include options for short cuts, longer hair, natural curls, and coils. Some keep all the hair back, while others leave the length loose around the shoulders.
Start with detangled hair and the tools you normally use. For curls and coils, follow your usual detangling routine rather than brushing the finished texture dry.
1. Half Up Ponytail With a Small Bow
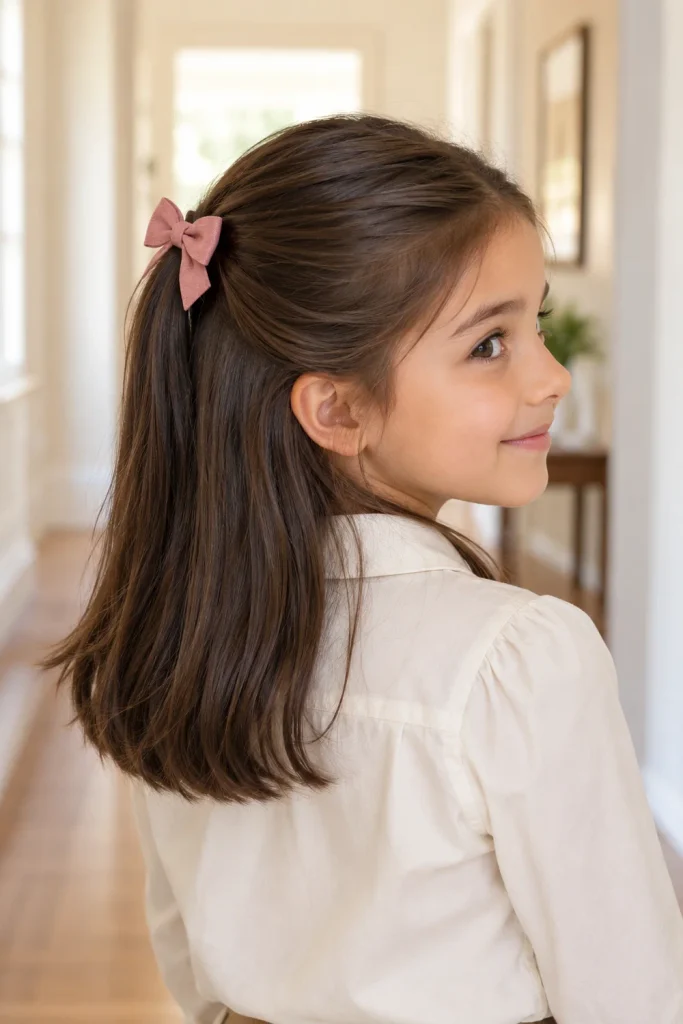
A half-up ponytail keeps the front tidy while leaving plenty of hair visible around the shoulders. It works especially well when your child wants to wear their hair down but keeps pushing it away from their eyes.
- Separate the top section by drawing a line from just above one ear to the other.
- Gather that section at the back of the head without pulling the sides tight.
- Secure it with a covered elastic, leaving the lower hair loose.
- Clip a small bow over the elastic and arrange the loose length.
Check the style from the front. The bow should decorate the hairstyle without sticking far above the head.
2. Low Side Ponytail That Shows Over One Shoulder
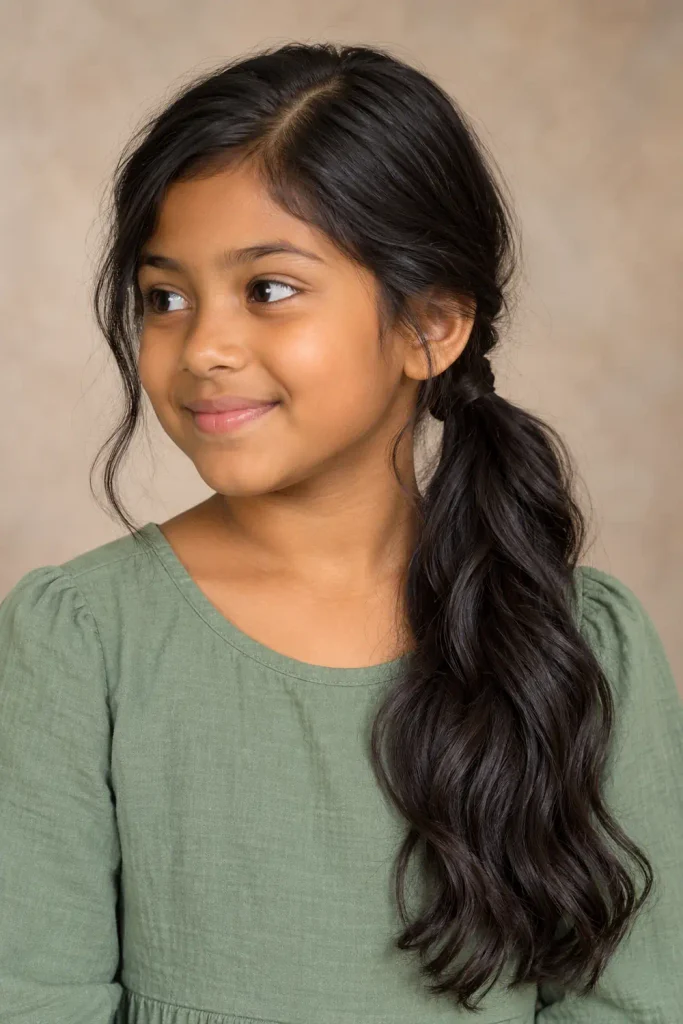
A ponytail at the back can disappear in a school portrait. Moving it slightly to one side brings the length into view, especially on shoulder-length or longer hair.
- Make a side part using a comb or your fingers.
- Gather the hair low behind the ear on the opposite side of the part.
- Secure the ponytail with a soft elastic.
- Bring the length forward over that shoulder and gently arrange the ends.
Leave the ponytail low enough that your child can turn their head comfortably. If shorter front pieces keep escaping, secure them with one flat clip rather than repeatedly tightening the elastic.
3. Two Classic Braids With Neat, Even Sections
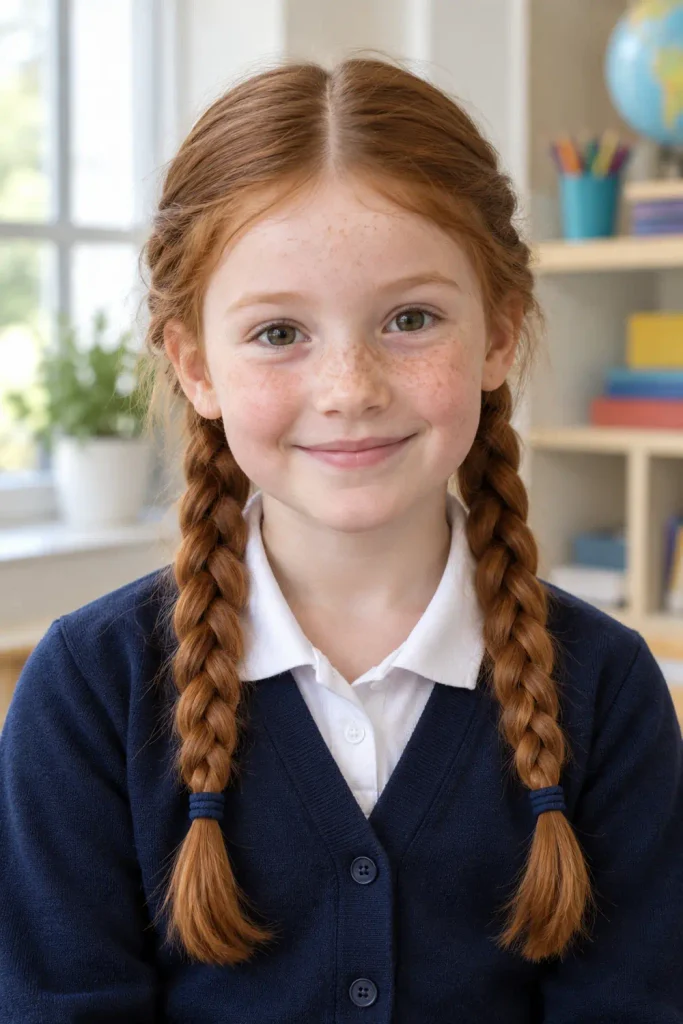
Two regular braids give you a tidy style without needing to add hair as you braid. The part matters more than making every strand sit flat.
- Part the hair down the middle, continuing to the nape, and clip one side away.
- Divide the loose side into three sections.
- Cross the right section over the middle, then the left section over the new middle. Repeat down the length.
- Secure the end and braid the other side, placing its elastic at a similar height.
Bring both braids over the shoulders for a front-facing photo. Keep the braid starts relaxed around the ears.
4. Short Bob With a Side Part and One Flat Clip
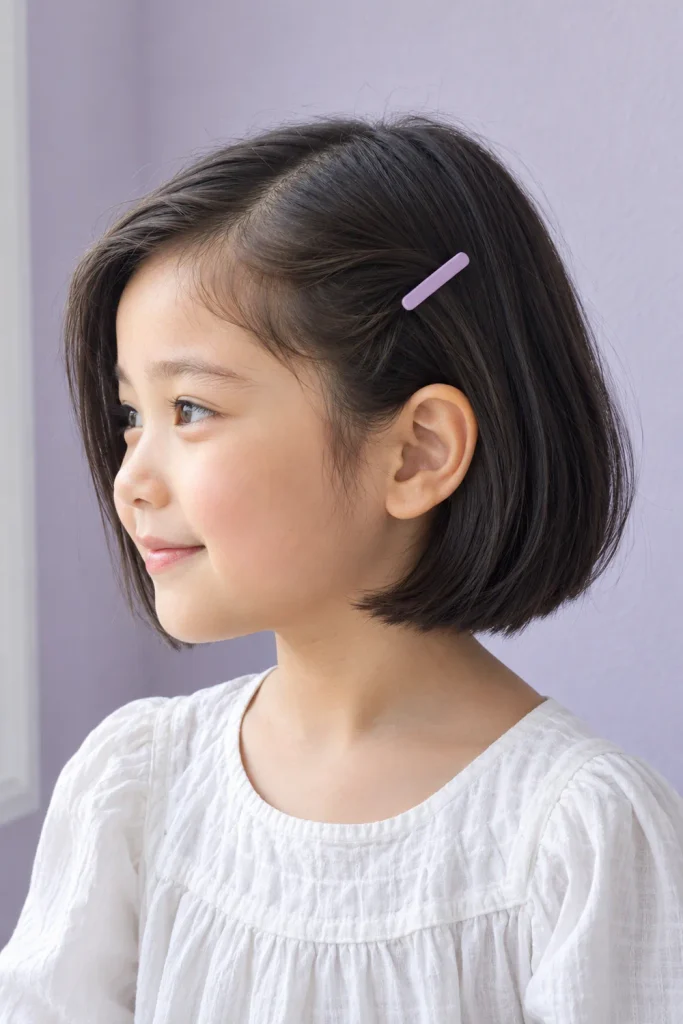
Short hair does not need to become an updo for picture day. A side part and a small clip can frame the face while keeping a longer fringe out of the eyes.
- Lightly dampen any front pieces that need reshaping.
- Make a side part and comb the hair into its usual shape.
- Sweep the larger front section toward the temple.
- Slide a flat clip into that section, catching enough hair to hold it in place.
Choose a clip your child already finds comfortable. For a very short bob, skip the attempt to tuck everything behind the ears and let the cut keep its natural outline.
5. Natural Curls With the Front Gently Pinned Back
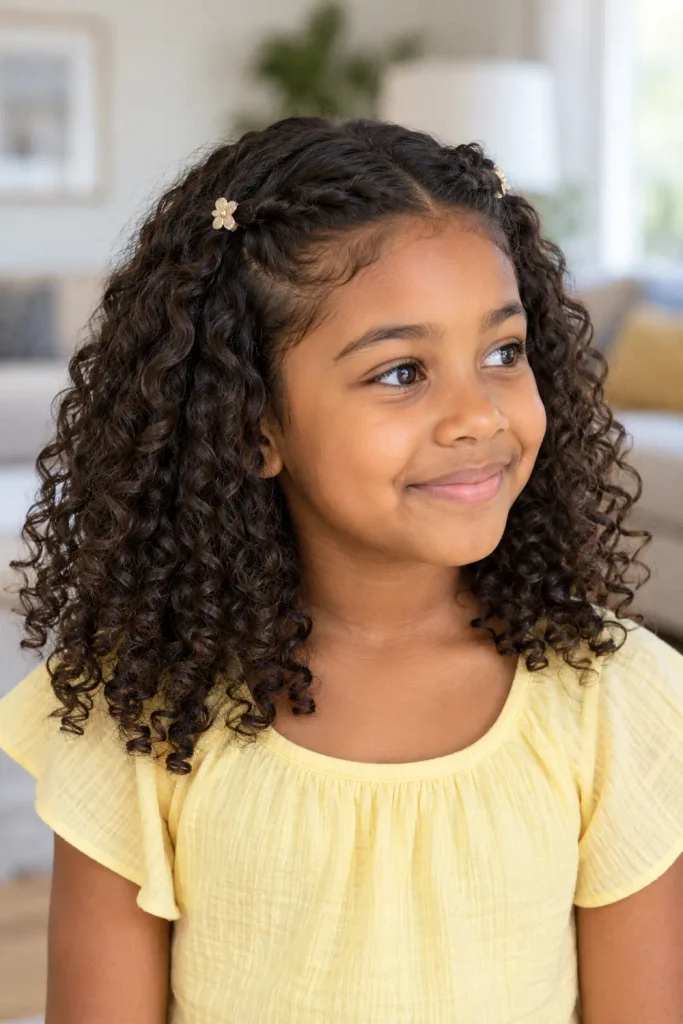
Keep the curls loose and move only the pieces that fall into the eyes. This leaves the texture visible without turning photo morning into a full restyling session.
- Refresh the curls with the method and products you already use.
- Separate a small section near each temple with your fingers.
- Gently twist each section away from the face and secure it with a small clip.
- Arrange the remaining curls without repeatedly running your hands through them.
Use as little hair as you need in the pinned sections. Before leaving, ask your child to look down and back up so you can see whether the clips stay put.
6. Bubble Ponytail With Soft, Even Sections
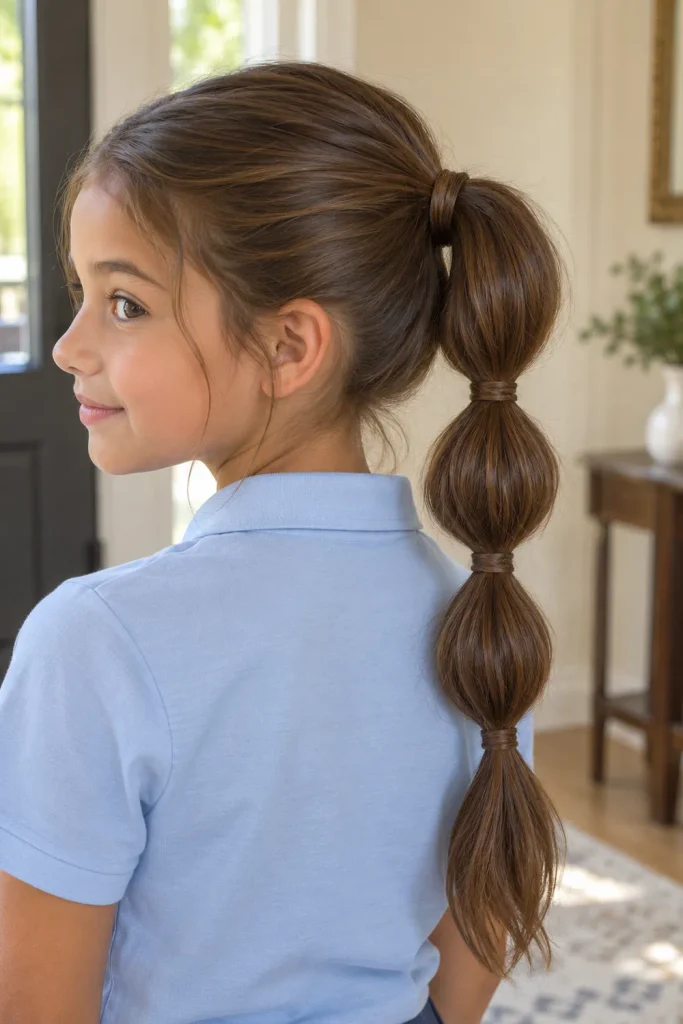
The bubble ponytail gives a regular ponytail a different shape without any braiding. Longer hair leaves more room between elastics, but a shorter ponytail can still have one or two bubbles.
- Gather the hair into a mid-height ponytail and secure the base.
- Place another covered elastic a little farther down the length.
- Gently pull the hair between the two elastics outward to make a rounded bubble.
- Add more elastics down the ponytail, shaping each section as you go.
Hold the ponytail while shaping the bubbles so you do not tug at the scalp. Stop before the ends become too thin to form another section.
7. Two Strand Twists With a Simple Side Part
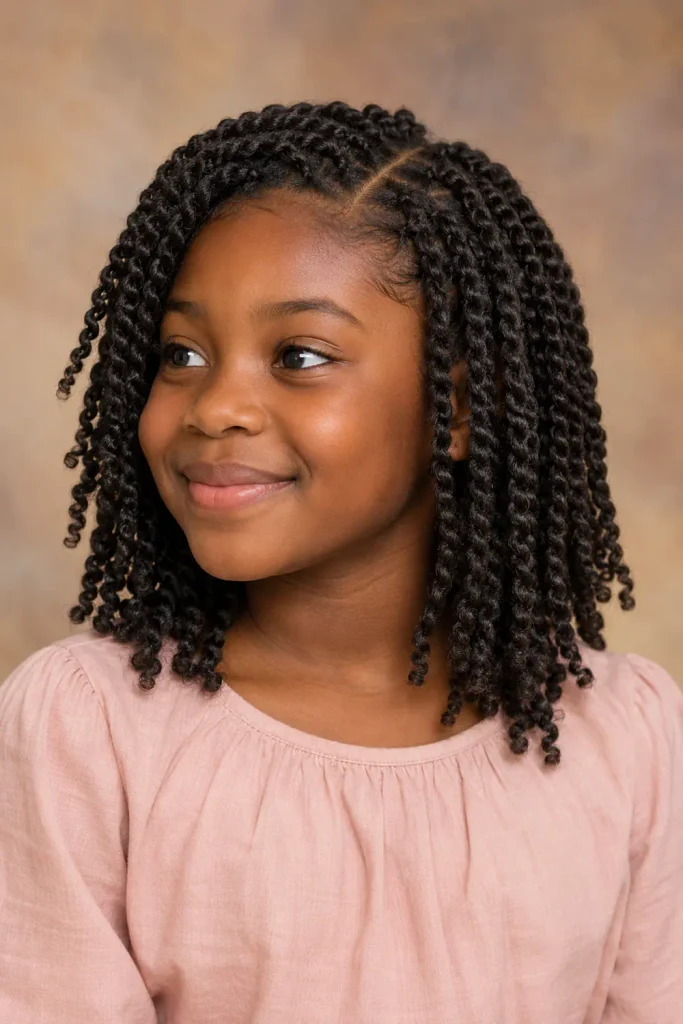
Individual two-strand twists let curls and coils sit in separate, defined sections. Begin with a side part if you want a softer front outline.
- Detangle using your usual routine, then divide the hair into manageable sections.
- Split one section into two similar strands.
- Wrap one strand over the other repeatedly toward the ends. Continue through the remaining sections.
- Let the twists settle and move any front twists away from the eyes.
Use the finishing method that normally works for your child’s hair. Loose ends on straighter textures may need covered elastics. This is a useful style to practice ahead of time if sectioning is new to you.
8. Low Bun With a Clean Part and Soft Finish
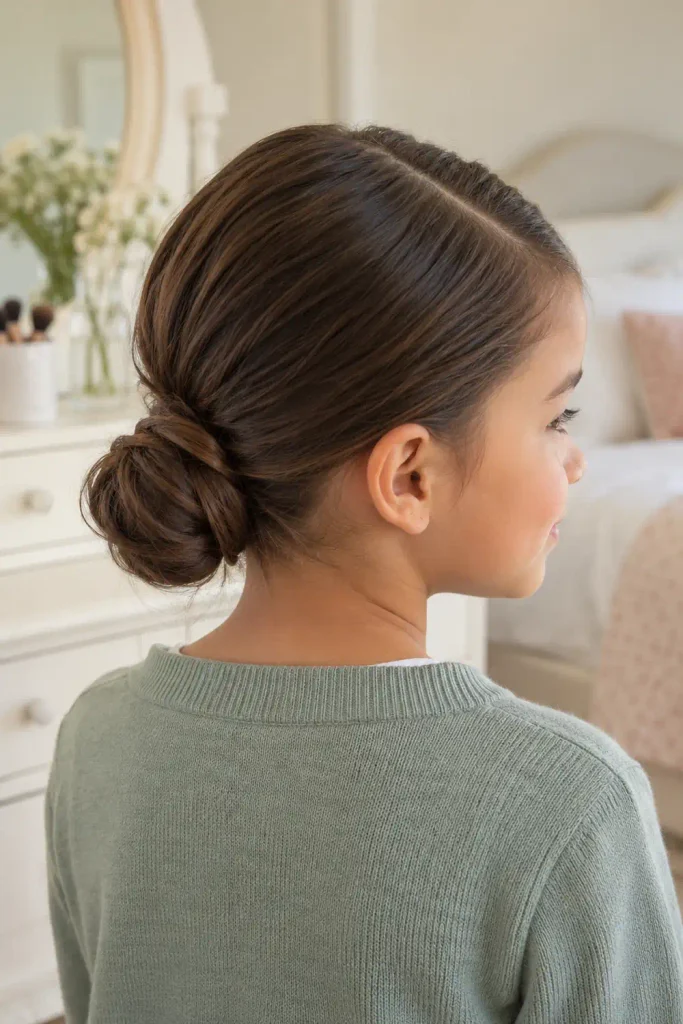
A low bun keeps long hair away from the collar, which helps when a picture day outfit has a ruffle or detailed neckline. It can have a soft finish rather than a tightly smoothed front.
- Choose a center or side part.
- Gather the hair into a low ponytail at the nape and secure it.
- Twist the ponytail loosely, then wrap it around its base.
- Hold the bun with another covered elastic. Use a small clip for a loose end if needed.
Ask your child to turn their head before you finish. Loosen and remake the base if it feels uncomfortable.
9. Side French Braid That Keeps the Fringe Back
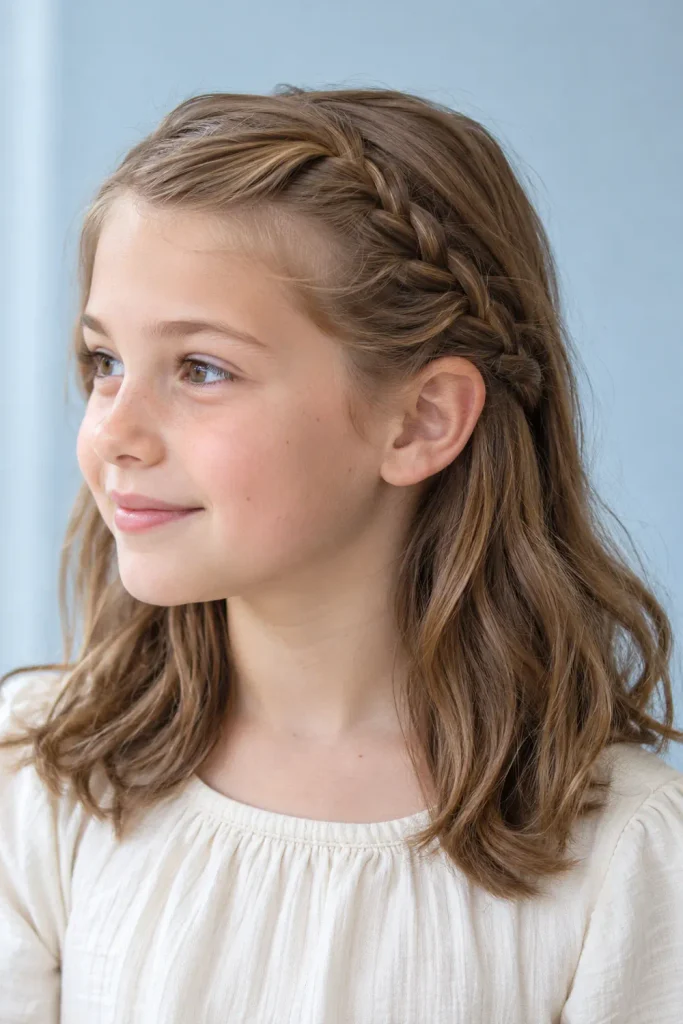
A short French braid along the front keeps longer fringe pieces together while leaving most of the hair loose. Practice the hand movement first if you usually make only regular braids.
- Make a side part and pick up a small front section on the fuller side.
- Divide it into three strands and begin a regular braid.
- Before crossing each outer strand over the middle, add a small piece of loose hair from beside the braid.
- Continue toward the ear, then braid the remaining section normally and secure it.
Keep the added pieces small so the braid stays near the front. Clip the end behind the ear if the length allows.
10. Two Low Pigtails With Matching Ribbon Bows
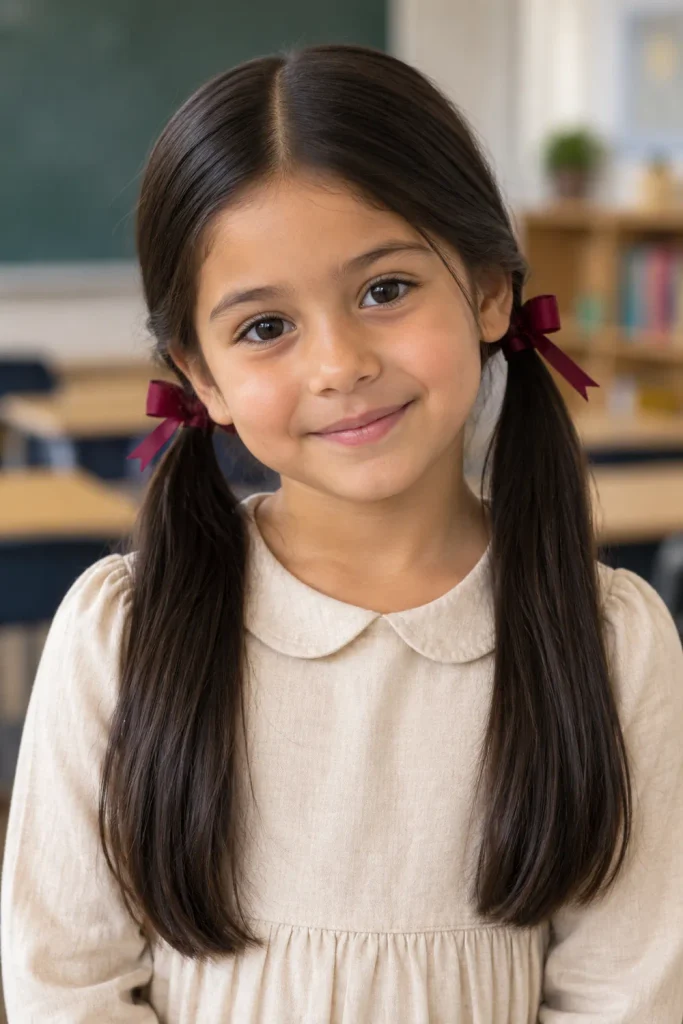
Low pigtails leave the face open and show on both sides of a portrait. Small bows work well when your child wants an accessory without covering much of the hairstyle.
- Make a middle part from the front hairline to the nape.
- Gather each half just below its ear.
- Secure both sides with covered elastics, checking their height from the front.
- Add a small bow to each elastic and arrange the ponytails.
Keep ribbon tails short enough to sit clear of the shirt collar. If your child has a bold print on their outfit, plain bows give the photo fewer competing details.
11. Short Coils With a Defined Shape and Neat Front
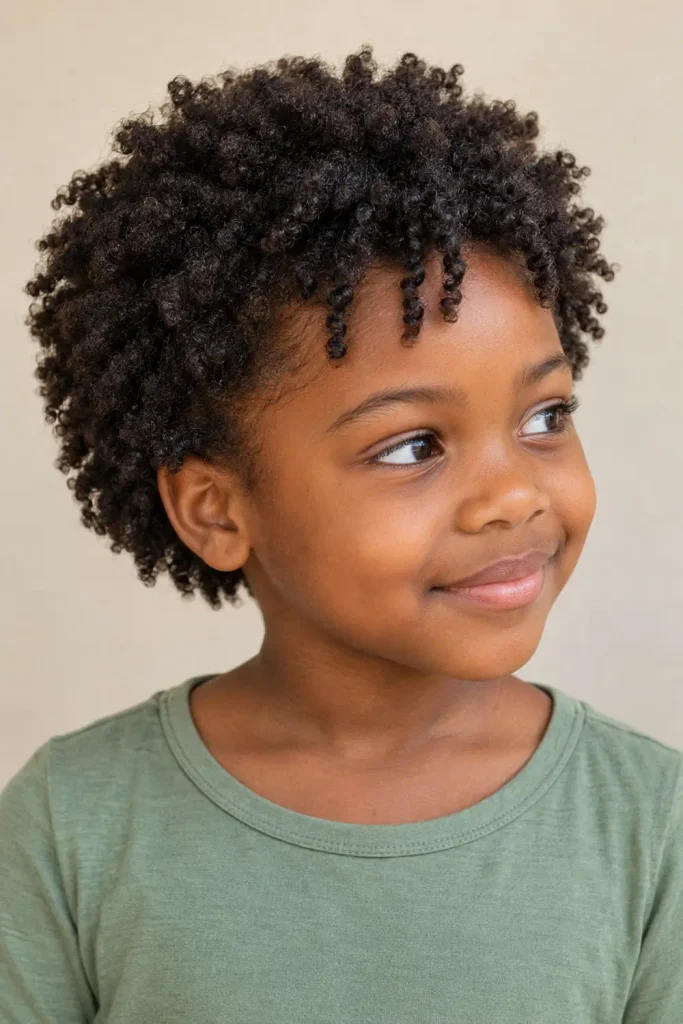
Short coils can stay loose for picture day. Focus on the outline of the cut and a few front sections instead of trying to make the entire hairstyle lie flat.
- Lightly refresh the hair using your usual method.
- Gently lift any flattened areas with your fingers.
- Separate or finger-coil a few front sections with a little of your familiar styling product.
- Check the shape from the front and each side, adjusting only where needed.
Leave room for the hair’s natural volume. If you are trying a new product or technique, test it on another day so the morning routine stays familiar.
12. Half Up Bun With the Rest of the Hair Loose
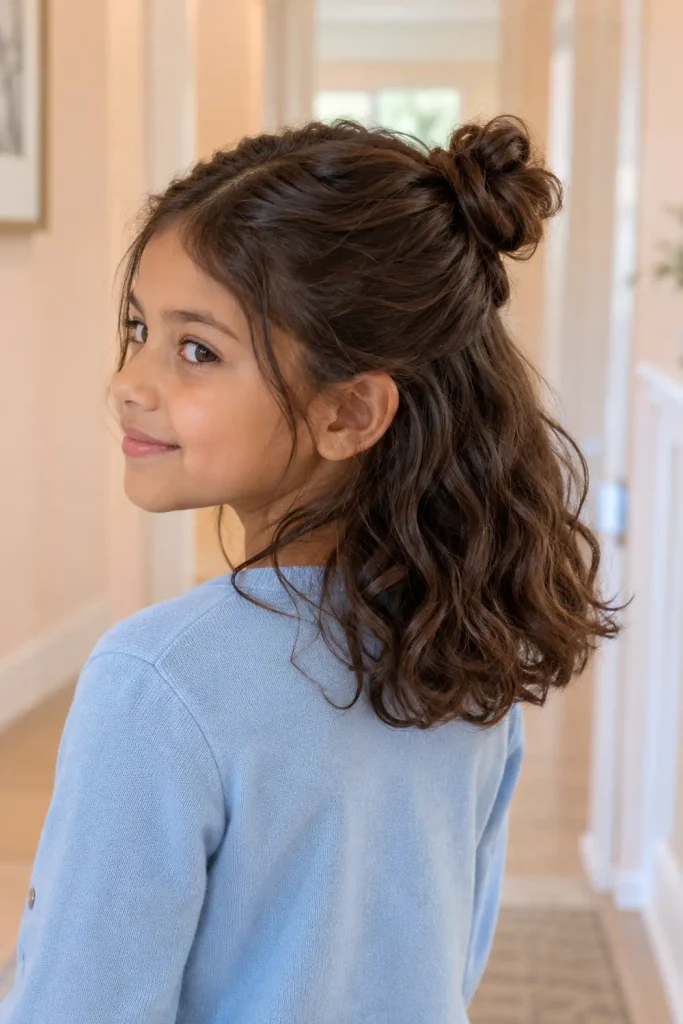
A small half-up bun lifts the front away from the face while leaving the lower length visible. Keeping the top section modest helps the bun sit neatly within the hairstyle.
- Separate the hair above the ears from the lower section.
- Gather the top hair near the back of the crown.
- Secure it into a ponytail, loosely twist the length, and wrap it into a small bun.
- Add a second elastic to hold the bun, then arrange the loose hair.
Check that the bun is secure when your child moves their head. On shorter hair, use less in the top section so the ends can wrap around the base.
13. Two Flat Twists Into Low Natural Puffs
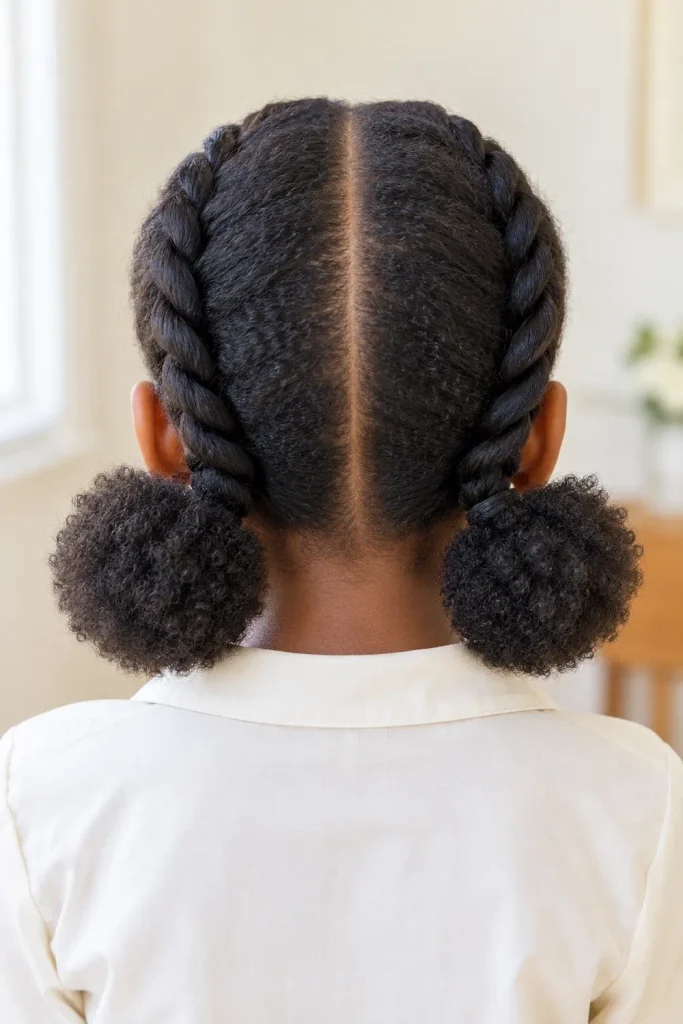
Flat twists guide the front hair toward two puffs at the back. Unlike individual twists, they pick up more hair as they travel along the scalp.
- Make a middle part and secure one half out of the way.
- At the front of the loose half, separate a small section into two strands.
- Cross the strands repeatedly, adding a little hair from the section underneath before each crossing as you move toward the nape.
- Secure the remaining hair into a low puff, then repeat on the other side.
Keep your hands close to the head without pulling hard. Shape the puffs gently with your fingers.
14. Short Straight Hair With a Soft Side Sweep
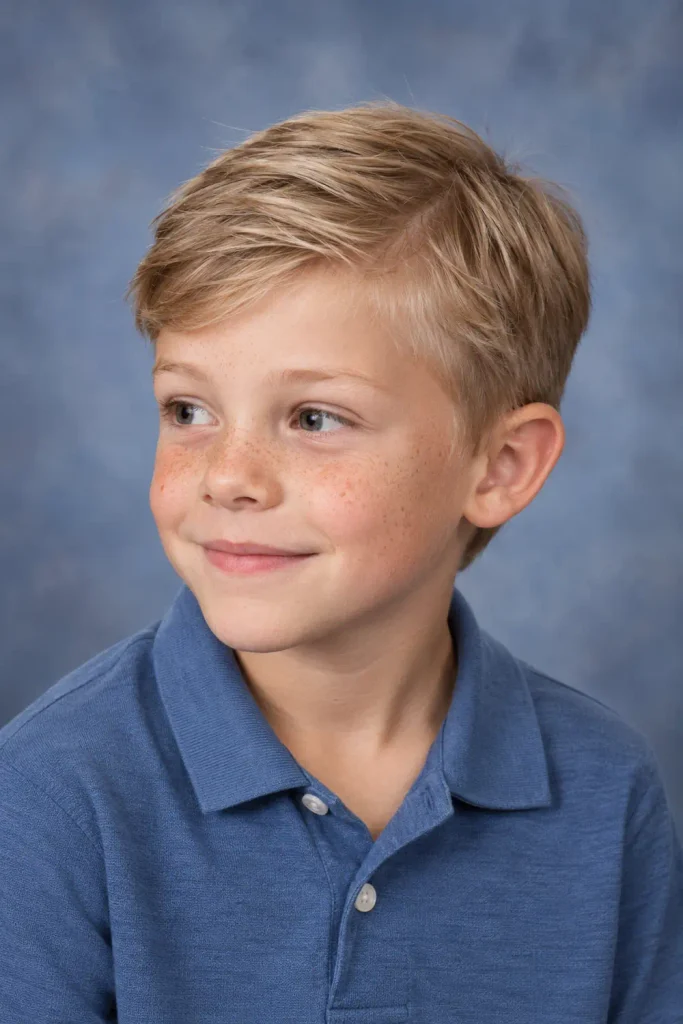
A soft side sweep gives a short cut a tidy front without needing an accessory. Follow the way the hair naturally falls, especially if a cowlick already decides the direction.
- Lightly dampen the front and crown.
- Find the natural part or make a shallow side part.
- Comb the top sideways, following the hair’s usual direction.
- Use your fingers to soften the comb lines and let the hair dry in place.
If you normally use a styling product, start with a small amount. Check the front again once it dries, since damp hair may sit differently from the finished style.
15. Loose Hair With a Narrow, Comfortable Headband
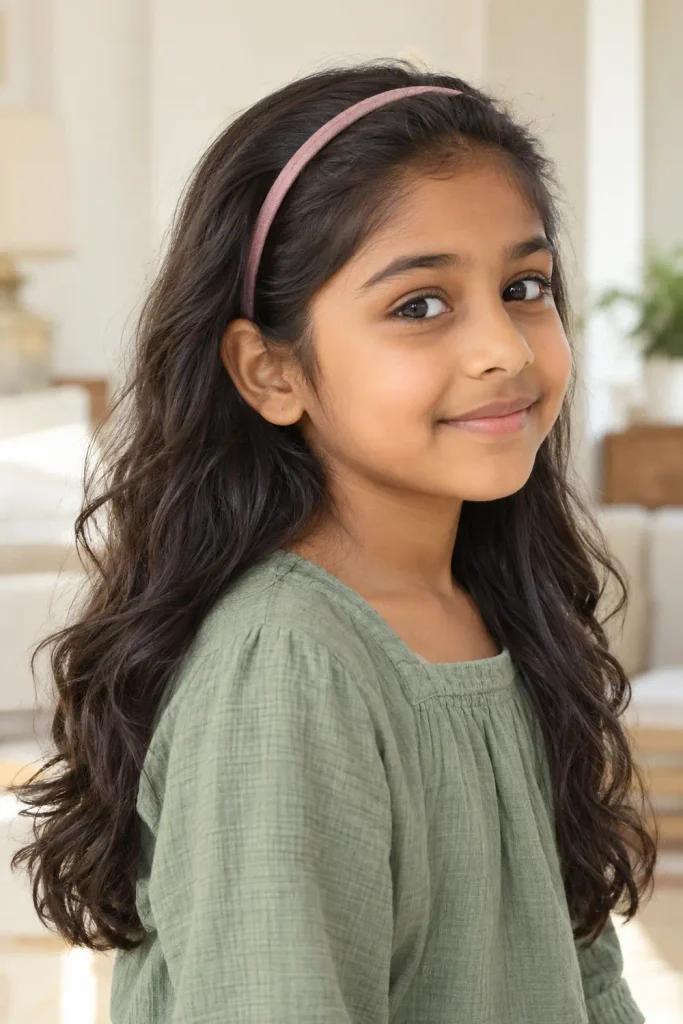
A headband is a simple option when your child likes wearing their hair loose. Choose one they have already worn comfortably through a school morning.
- Arrange the hair in its usual part and texture.
- Place the headband just behind the front hairline.
- Gently draw the front pieces back, leaving the rest loose.
- Check the fit behind the ears and ask your child to move their head.
For curls, use your fingers to free any sections trapped underneath. A narrow band leaves more of the hairstyle visible. If the band keeps slipping during practice, choose a clip instead.
Make Picture Day Hair Feel Familiar
The most useful picture day hairstyles for kids are the ones that suit their hair, feel comfortable, and survive the trip to school. Choose the style with your child, set out the tools the night before, and leave unfamiliar braiding techniques for a practice day.
Before heading out, check the hairstyle from the front with the picture day outfit on. Move hair away from the eyes, straighten a bow, and leave the rest alone. A few soft strands or natural curls do not need constant fixing.
Save this list on Pinterest so you have a few familiar options ready for the next school photo.
