
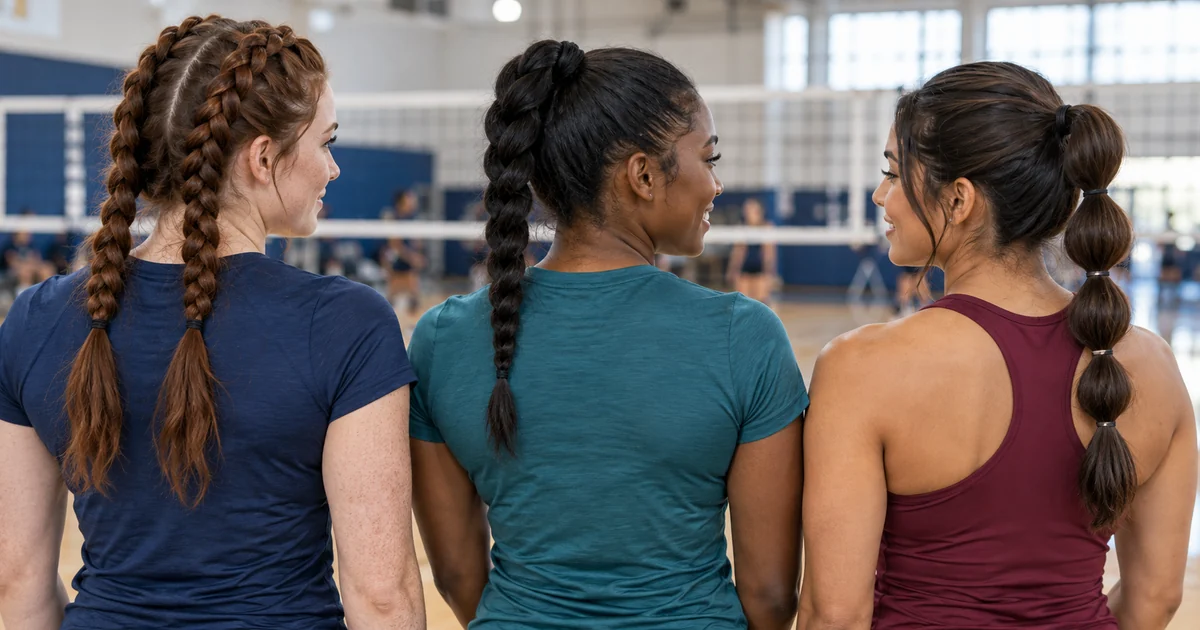
Good volleyball hairstyles keep your view clear when you track a serve, move into a dig, or reach for a block. They also need to feel comfortable after warm-ups, especially when practice turns into several hours on the court.
Braids help gather shorter pieces along the scalp, while ponytails make it easy to pull the remaining length away from your face. Combining those two approaches gives you plenty of options without needing a complicated updo.
The right choice depends on your length, texture, layers, and braiding skills. These 15 ideas include simple braided ponytails, beginner-friendly alternatives, and options for curls, coils, and shorter hair. Try your favorite during practice before wearing it for a match; no hairstyle holds exactly the same way on everyone.
What Makes a Hairstyle Practical for Volleyball?
A practical volleyball hairstyle controls both the front sections and the loose length. If your bangs fall forward, start with a braid near the hairline. If your ponytail swings across your shoulders, braid or section the tail instead of repeatedly tightening the base.
Gather a comb, a few covered hair elastics, and small bands for braid ends. Add a little of your usual styling product if you need help gathering flyaways. For curls and coils, work in sections and keep your natural texture rather than brushing everything into a flat finish.
Comfort matters. The American Academy of Dermatology explains that repeated pulling from tight hairstyles can cause traction alopecia. If a style causes pain or stinging, loosen or change it. Secure hair should not require a painful hairline.
1. Double Dutch Braids
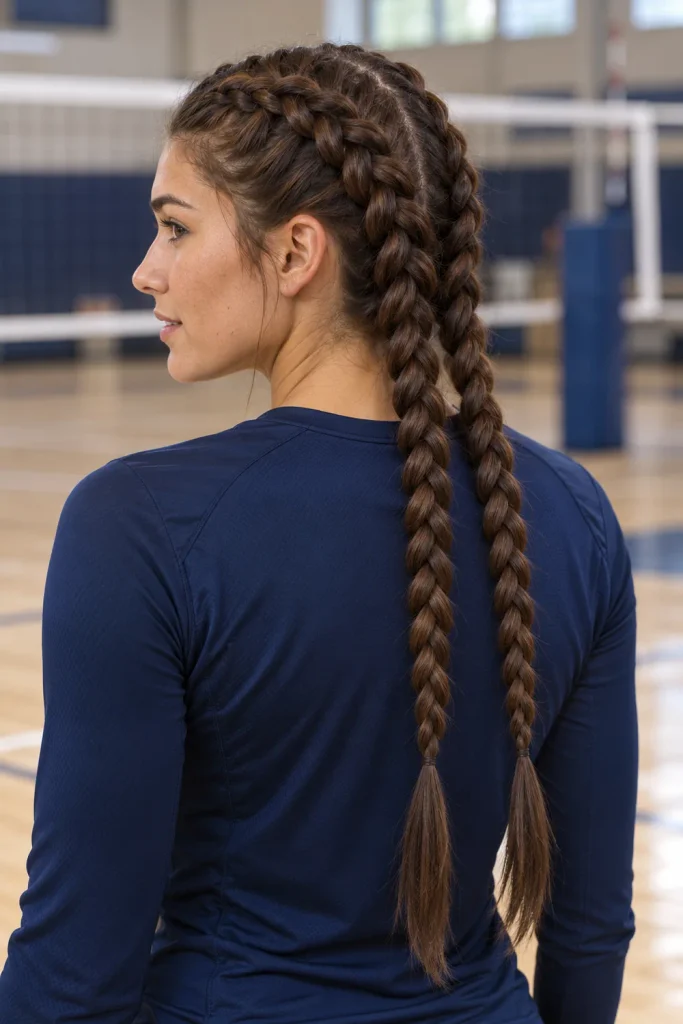
Double Dutch braids gather hair from the front all the way to the ends, making them a useful starting point when a basic ponytail leaves pieces around your face.
Create a center part from your forehead to the nape and clip one half aside while styling. Take three small sections near the front of the other half. Cross each outer section under the middle section, adding nearby hair before each crossing. Continue toward the nape, then finish with a regular three-strand braid and an elastic. Repeat on the second side.
Keep the sections manageable and the tension comfortable. For layered hair, smaller additions can help incorporate pieces as you move backward. Leave the finished braids compact for play; pulling the edges outward for extra volume can release shorter strands.
2. Double French Braids
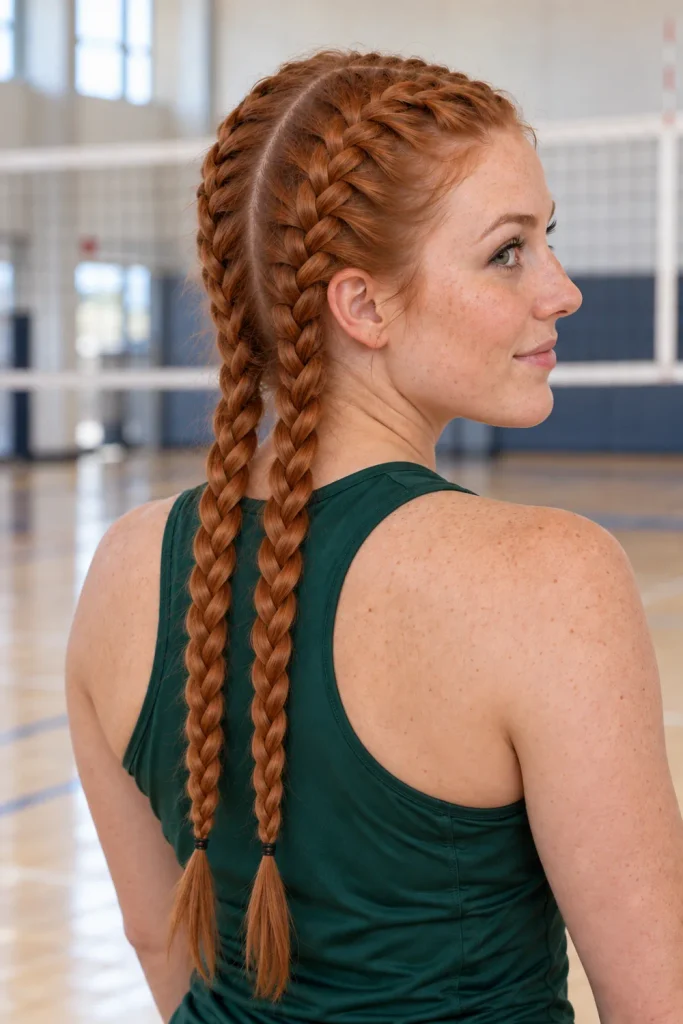
Double French braids create a flatter looking finish than Dutch braids. They are worth trying if you like two separate tails but prefer the braids to sit close to the scalp.
Divide your hair down the middle. Start with three sections above one temple, crossing the outer strands over the middle strand. Add a small amount of hair to each outer strand before crossing it. Work toward the nape and braid the remaining length. Secure the end, then repeat on the other side.
Position both braids toward the back rather than directly beside your cheeks. This helps keep the tails behind your shoulders. With thick hair, finish one side completely before starting the other so loose sections do not become mixed together.
3. Single French Braid
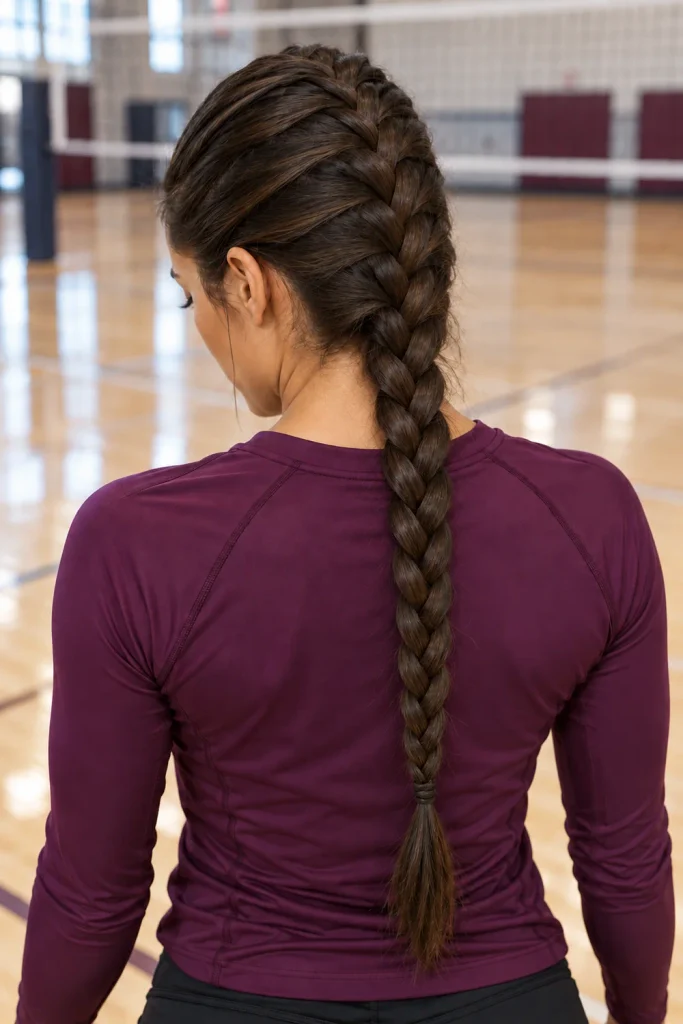
A single French braid is a straightforward option for medium or long hair when you want one continuous braid without a ponytail elastic at the crown.
Take a section above your forehead and divide it into three strands. Cross the outer strands over the center, adding hair from each side as you work backward. Once all your hair is incorporated at the nape, continue with a three-strand braid and secure the ends.
Check the hair around your ears before finishing. Those sections sometimes stay loose even when the crown looks neat. If you have very short front layers, two smaller braids may gather them more easily than one large braid. For long hair, bring the finished tail behind your back before warm-ups.
4. Single Dutch Braid Into a Ponytail
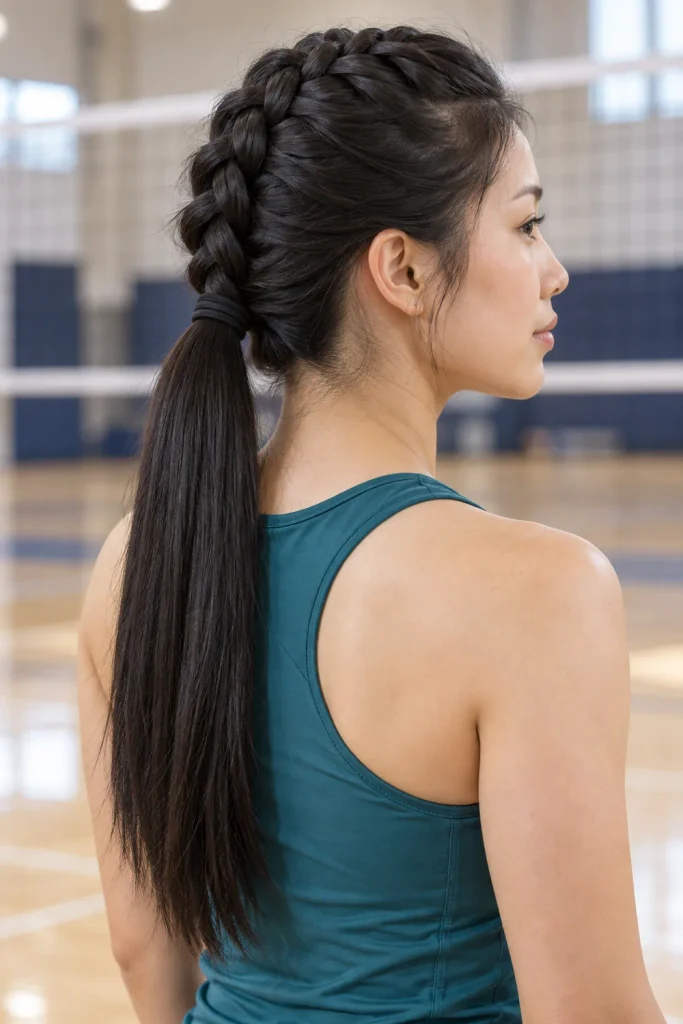
This combination gives you a raised braid through the crown with an unbraided ponytail at the back. It is a good choice when front pieces need structure but your remaining length is short enough to manage in a ponytail.
Start a Dutch braid at the front by crossing the outer strands under the middle. Add hair from both sides until you reach the back of your head. Gather the braid and remaining hair together, then secure them with a covered elastic.
Choose the ponytail position before braiding so the braid ends near its base. A middle placement is an easy starting point. If the loose tail reaches your face during movement, braid it after tying it rather than pulling the base tighter.
5. High Three Strand Braided Ponytail
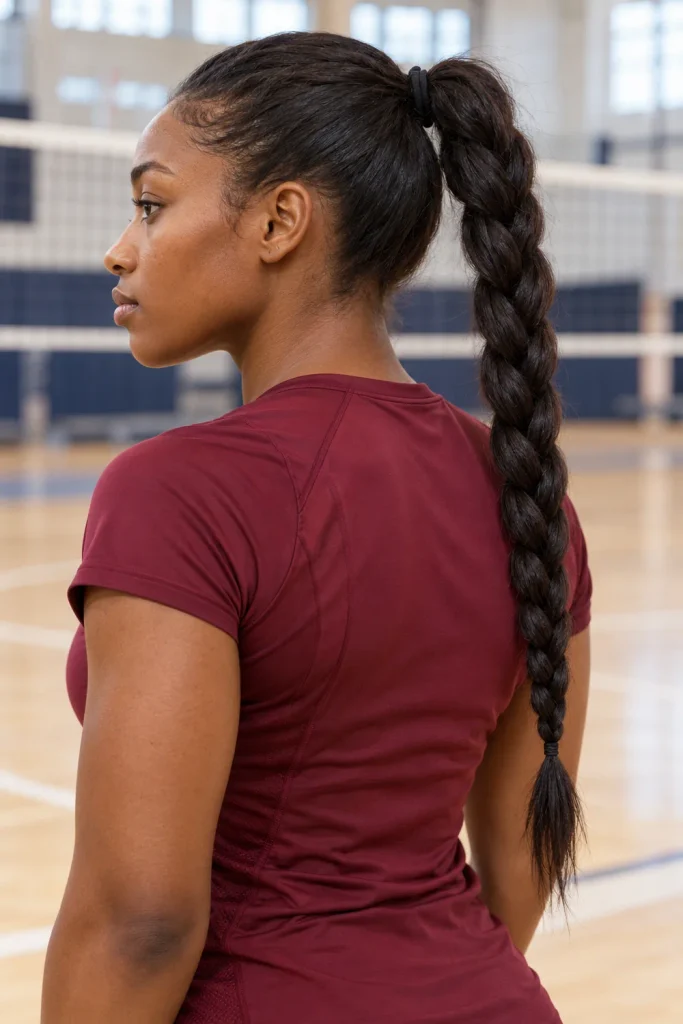
A high braided ponytail is one of the easiest volleyball hairstyles to build from a style you already know. You need only a regular ponytail and a basic braid.
Gather your hair above the middle of the back of your head and secure it comfortably. Divide the ponytail into three equal sections. Cross the outer strands over the middle, continuing down the length, and tie the end with a small band.
The braid contains the loose strands, although the finished tail can still swing. Keep that in mind if your hair is especially long. If the high placement feels heavy or pulls when you look upward, remake the ponytail lower before practice. Use a properly fitting elastic rather than forcing extra-tight wraps.
6. Low Ponytail With Braided Sides
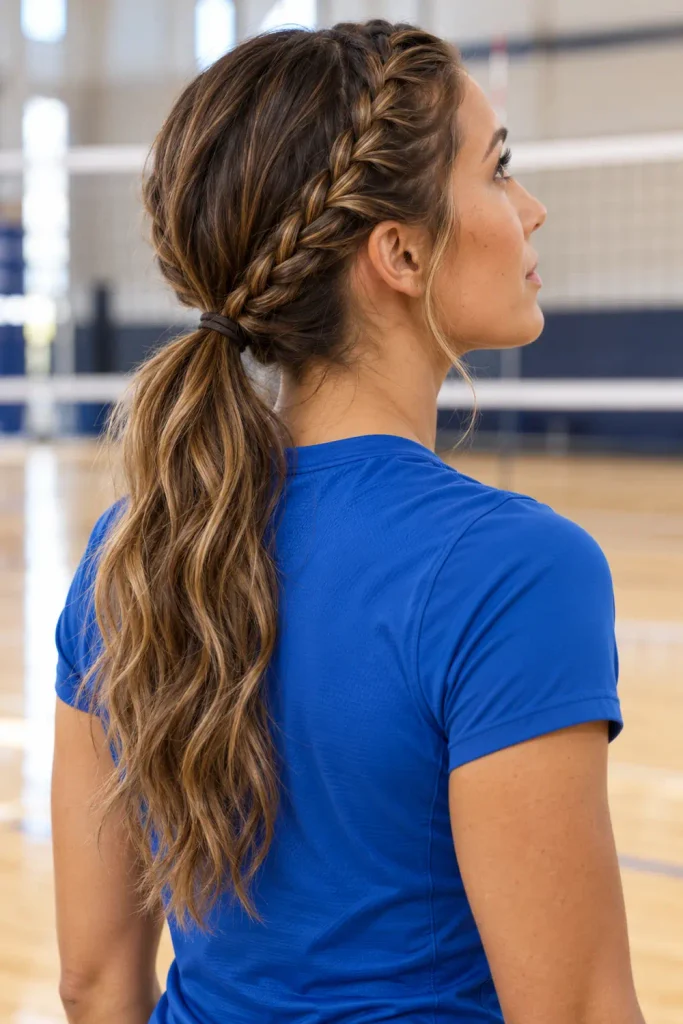
Braided sides are helpful when the hair near your temples escapes a low ponytail. They let you secure those sections separately before gathering the back.
Make a center or slightly off-center part. On each side, create a small French braid that travels from the temple toward the back of your head. Temporarily secure each braid. Gather both braids and the remaining hair into a low ponytail, positioning the main elastic over the braid ends.
Keep the tails of the small braids inside the finished ponytail. This style works especially well when your front layers are long enough to braid but too short to reach the main elastic directly. Braid the ponytail too if its length bothers you during passing or serving.
7. Compact Bubble Ponytail
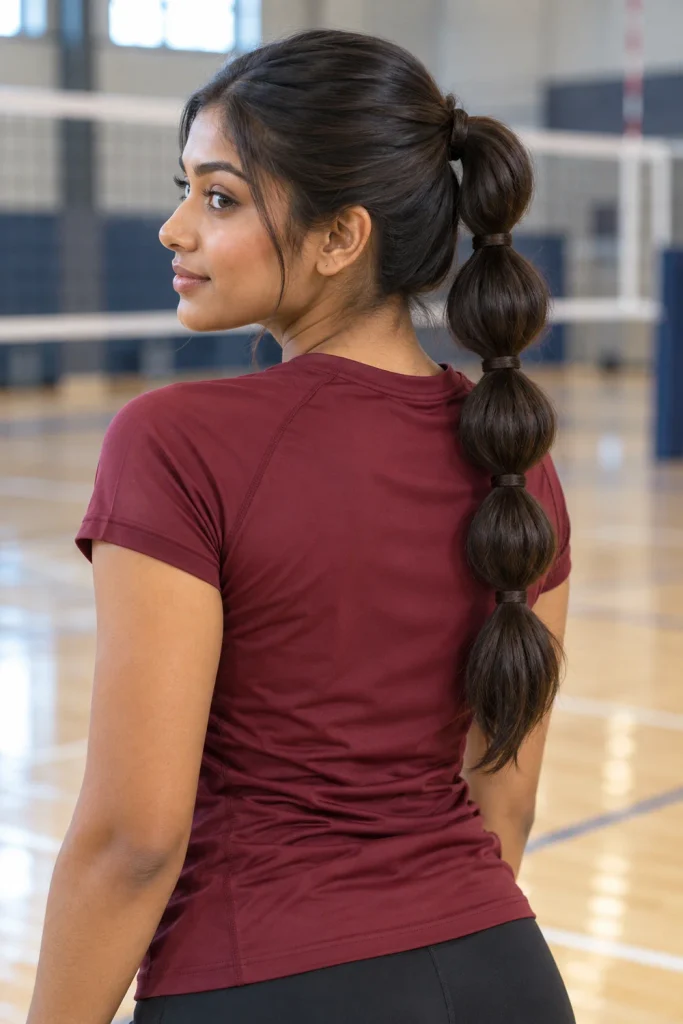
A bubble ponytail offers a simple alternative when you do not know how to braid. Several elastics divide the tail into manageable sections.
Start with a ponytail at a comfortable height. Add a small elastic a few inches below the base, then continue placing bands down the length. Gently shape the sections between them into rounded bubbles, keeping each one relatively compact.
You do not need to stretch the bubbles dramatically to make the style visible. For layered hair, position a band near a point where shorter ends start to escape. Team-color elastics can add a coordinated detail without long ribbons. Remember that the main elastic still supports the ponytail; bands along the tail do not remove tension at the base.
8. Rope Braid Ponytail
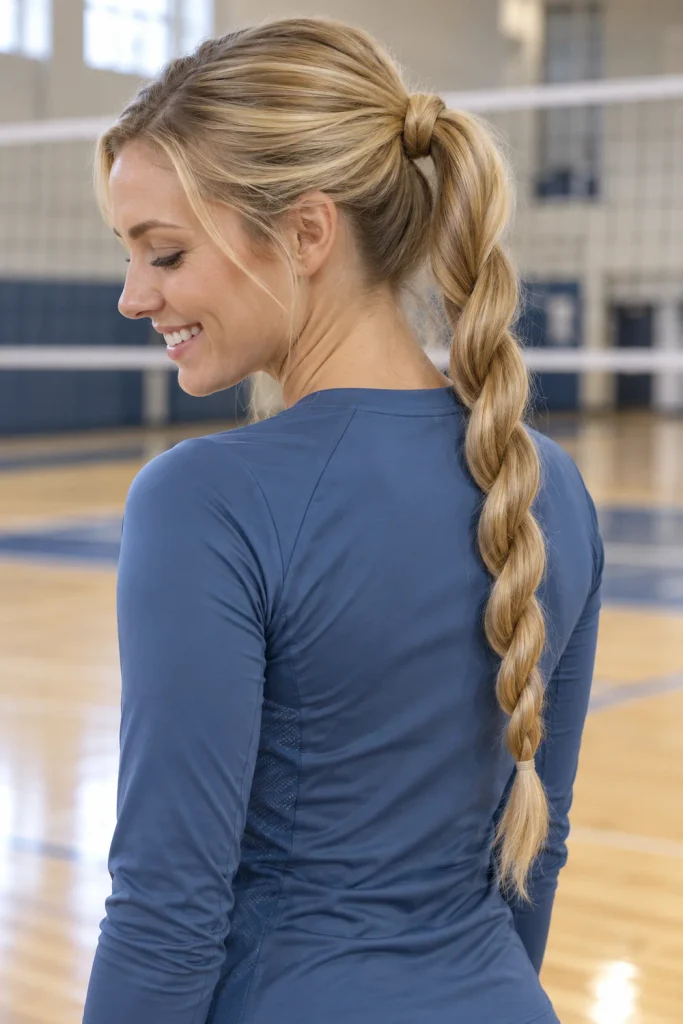
A rope braid uses two sections rather than three. It creates a twisted finish and gives you another way to contain a ponytail without learning a scalp braid.
Secure your ponytail first, then divide it into two sections. Twist both sections individually in the same direction. Wrap them around each other in the opposite direction, continuing the individual twists as you work down. Tie the end with a small elastic.
That opposite wrapping direction is the key to the rope shape. Simply twisting two loose sections together can leave a tail that unwinds quickly. Practice the motion before game day, especially if your hair is slippery. If layers repeatedly pop out, switch to a three-strand braid for that session.
9. Fishtail Braid Ponytail
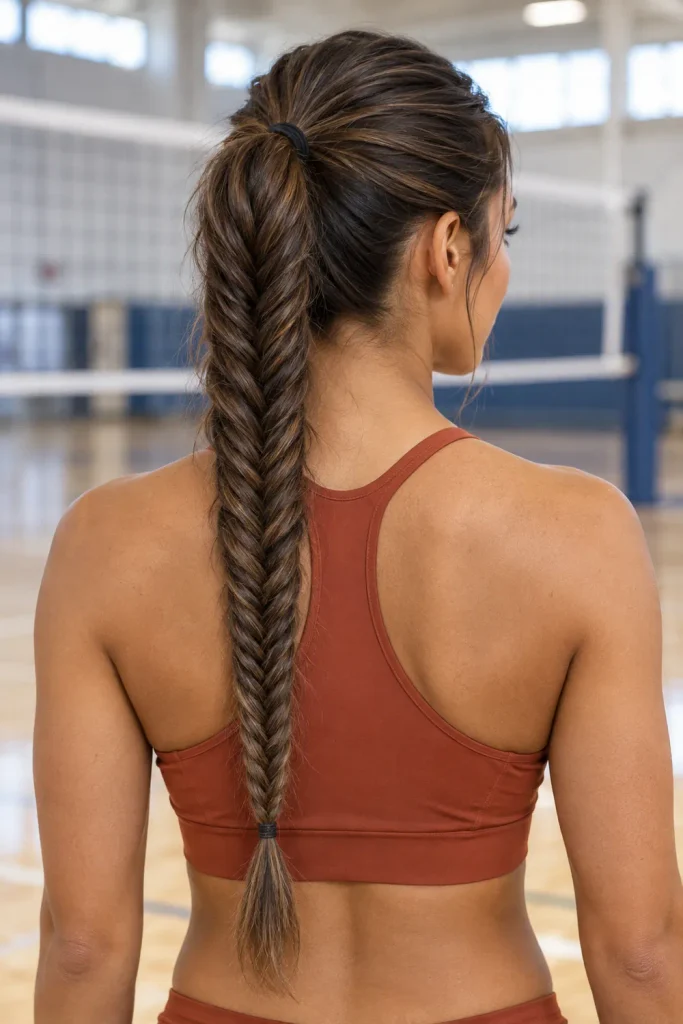
A fishtail ponytail adds a detailed woven pattern while gathering the loose length. It is an option for longer hair when you have more time to style.
Make a ponytail and divide it into two halves. Take a small piece from the outside of the left half and cross it into the right half. Take a small piece from the outside of the right half and cross it into the left. Repeat, alternating sides, until you reach the ends.
Secure the braid without stretching its edges into a wide, loose shape. Similar-size pieces make the pattern easier to maintain. A fishtail requires more repetitions than a basic braid, so it may be better for planned match preparation than a rushed change between sets.
10. Pull Through Ponytail
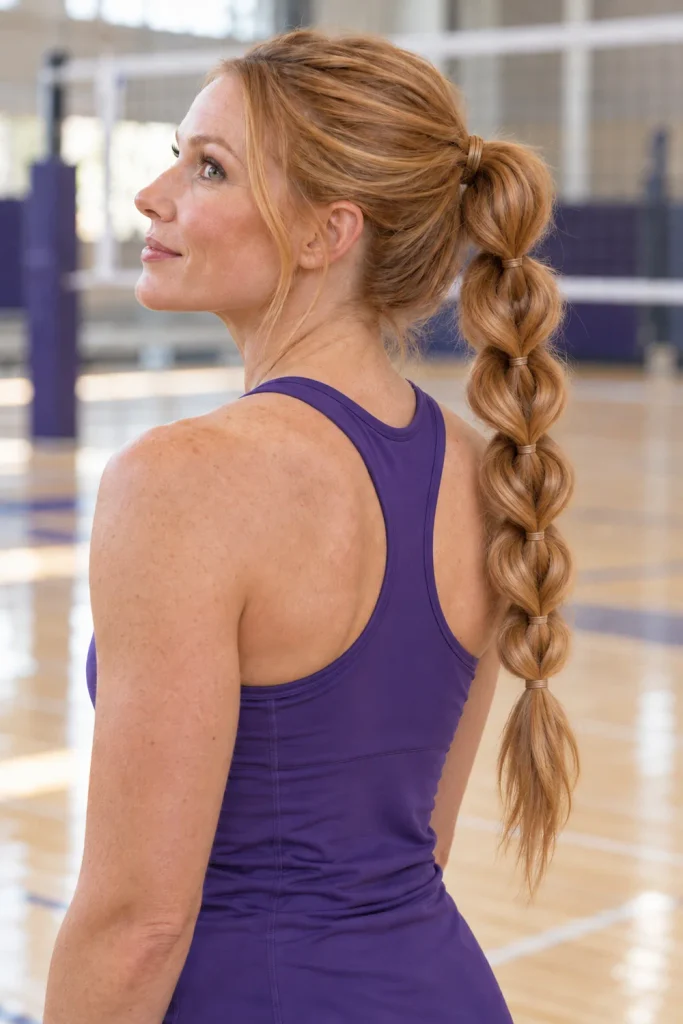
A pull-through ponytail creates a braid-like shape using linked ponytail sections. Choose it when you enjoy a structured look but find French or Dutch braiding difficult.
Begin with one main ponytail. Divide its length into an upper and lower section, securing a small band near the top of each. Split the upper section in half and bring both halves around the lower section. Hold the lower section out of the way, join the split halves beneath it, and secure them with another band.
Repeat with the section now on top, working down the tail. Keep the loops small for play. Because this style uses several elastics, take extra time when removing them; unwind the bands instead of dragging them through your hair.
11. Triple Stacked Ponytail
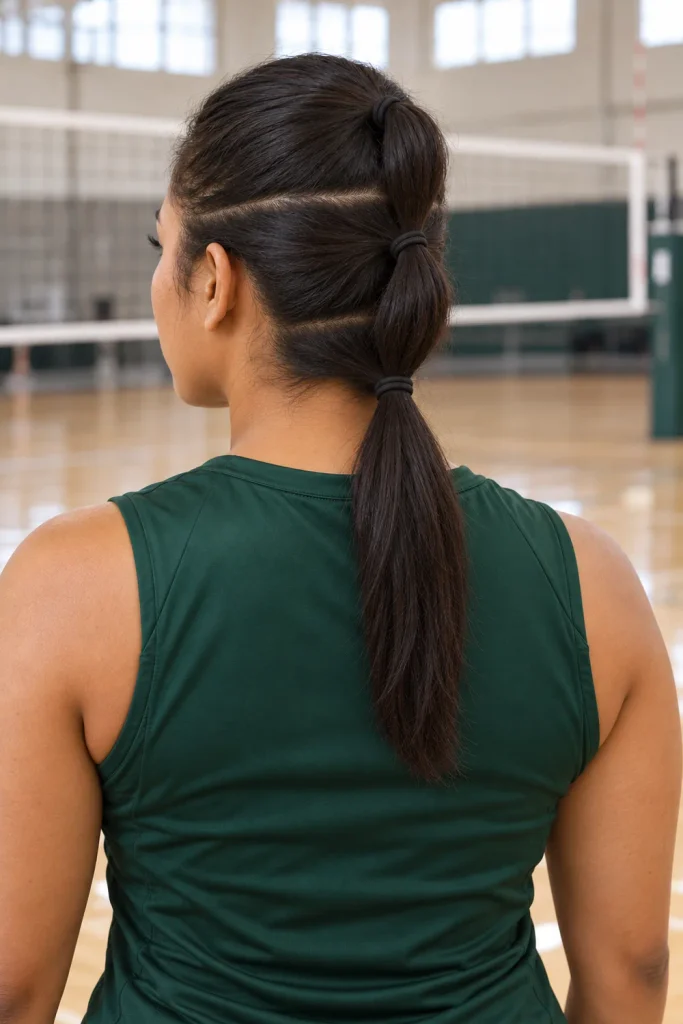
Stacked ponytails gather hair in stages down the back of your head. They can help when a single ponytail misses shorter crown or nape sections.
Gather the top section into a small ponytail. Create a second section just below it, adding the first ponytail before securing the second elastic. Gather the remaining hair at the nape and include the second ponytail in the final one.
Keep all three bases in a straight line so the hair follows one clear path. The last ponytail can stay loose if it is short, or become a basic braid if it is longer. This is also a useful beginner option because you can adjust one section without undoing the entire hairstyle.
12. Front Lace Braid Into a Low Ponytail
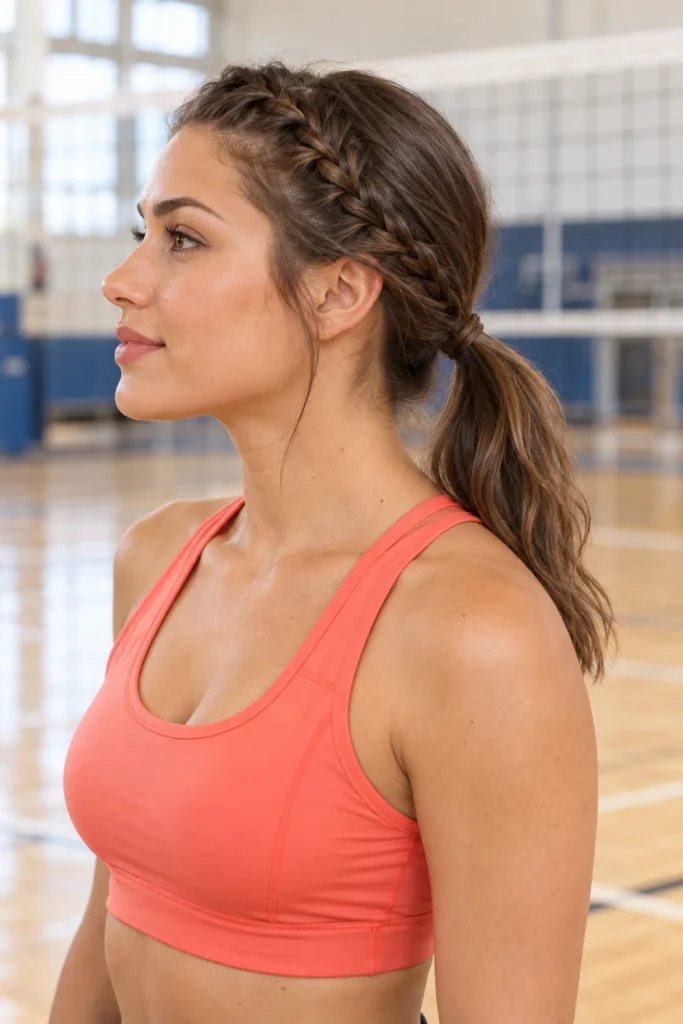
A lace braid focuses on the hairline, making it useful for a long fringe or front layers that fall across your eyes.
Create a side part and take three small sections near the part. Begin a French-style braid across the front, but add new hair only to the strand closest to your face. Follow the hairline toward your ear. Once the front pieces are gathered, finish the section as a regular braid.
Bring that braid backward and include it in a low ponytail with the rest of your hair. Check that the braid follows the hairline comfortably rather than pulling it sideways. Very short bangs may still need a permitted soft headband instead of being forced into the braid.
13. Cornrows Into a Low Braided Ponytail
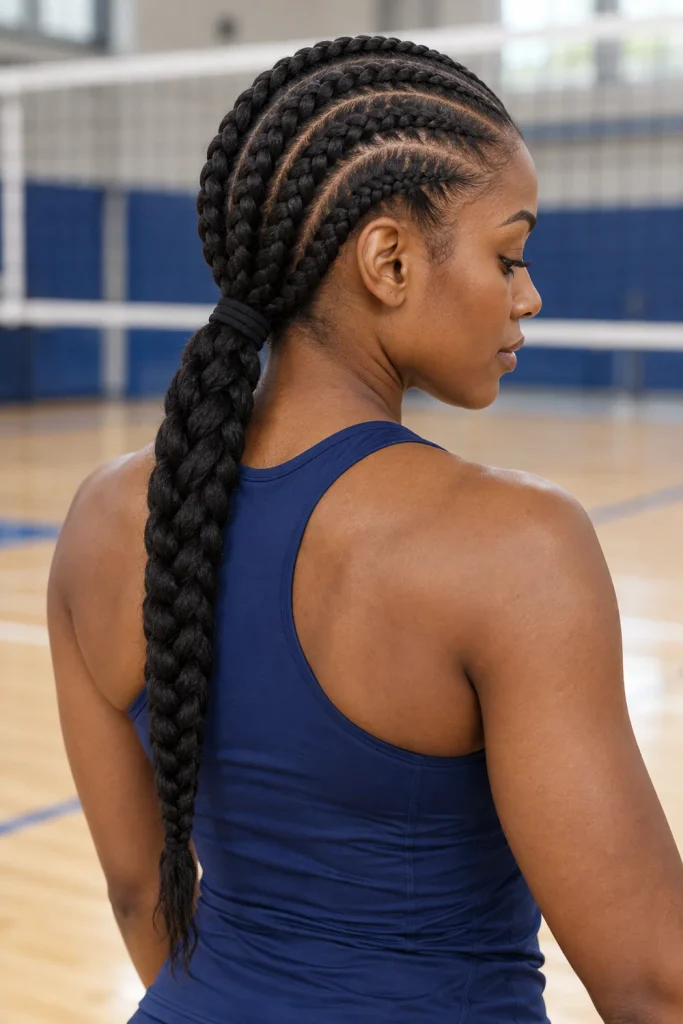
Cornrows leading into a low ponytail combine scalp braids with a contained finish. This is an option for natural hair when you already wear cornrows or have someone comfortable creating them.
Plan several sections that travel toward the same low gathering point. Braid each section close to the scalp, adding hair as you go. Continue the individual braids beyond the scalp so they can reach the ponytail base. Gather the finished braids with a covered elastic, then braid the grouped length if it is manageable.
Choose the layout around your natural density and length. Added extension length is unnecessary for this look. If your existing braids feel heavy in one ponytail, try a lower placement or divide them into two manageable groups instead.
14. Two Flat Twists Into a Curly Ponytail
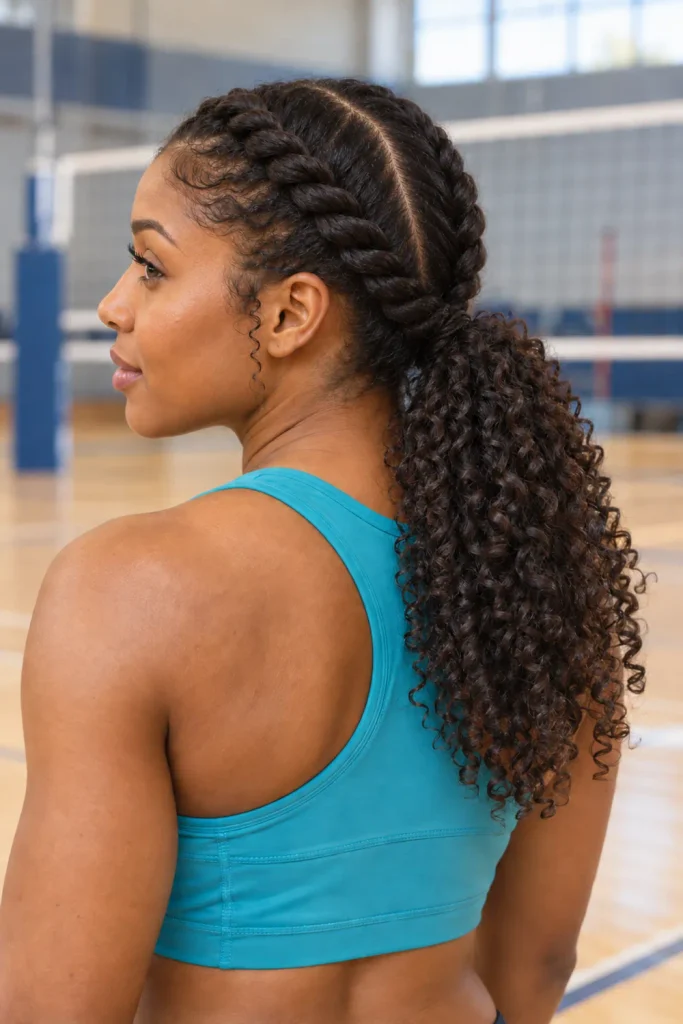
Flat twists can gather the front while leaving your curls visible at the back. They offer a different technique when you prefer two-strand styling to braiding.
Part your hair through the center or slightly to one side. On the first side, take two small sections near the front and twist them around each other, adding nearby hair as you move toward the back. Secure the end temporarily and repeat on the other side. Gather both twists and the remaining curls into a ponytail.
Position the ponytail so the curls stay behind your head when you bend forward. If the ends reach your eyes, divide the tail into two loose braids. Flat twists may loosen on some textures, so check them during practice before relying on them for a match.
15. Short Double Braids With Mini Ponytails
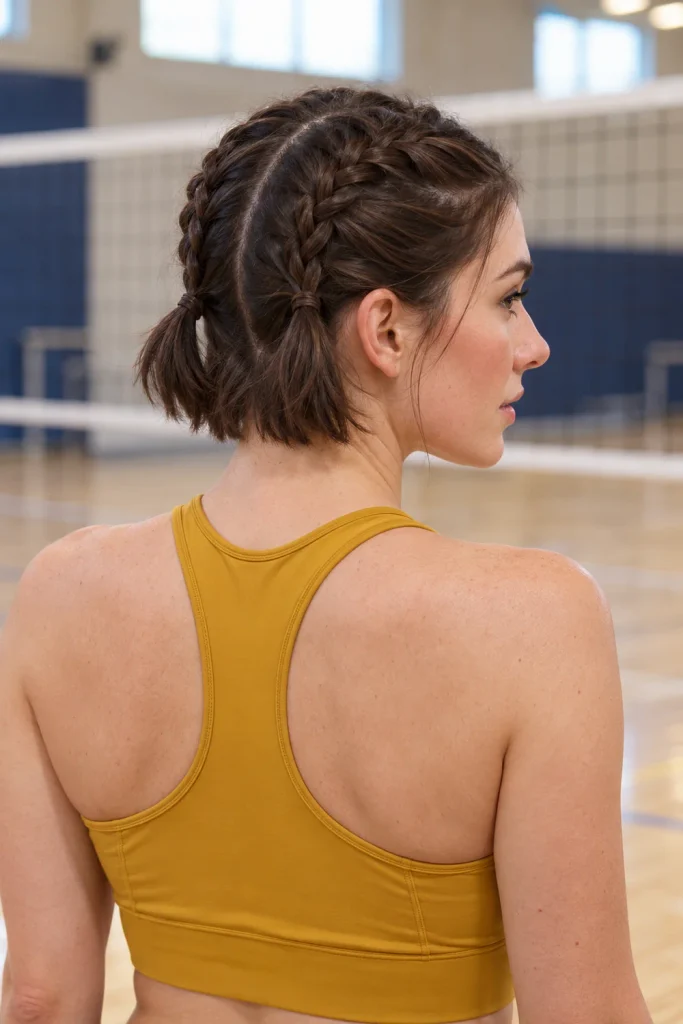
Shorter hair may not reach one central ponytail. Two small braids ending in separate mini ponytails give each side a closer gathering point.
Part your hair down the center and start a small French or Dutch braid near each temple. Add hair as you travel toward the back. Stop where your available length becomes too short to continue, then gather the reachable ends into a mini ponytail on each side.
Avoid tugging short nape pieces upward just to make the finish look perfect. If those pieces stay away from your eyes, they may not need to join the ponytails. For a bob with front sections too short to braid, a soft headband may be a more practical starting point.
How to Check Your Hairstyle Before a Match
After styling, look up as if tracking a high ball, turn your head, and bend into your usual passing position. Add a few gentle jumps during warm-ups. Notice whether hair falls into your eyes, a braid catches your shoulder, or an elastic starts sliding.
Adjust the specific problem. Rebuild a loose front section, replace a stretched band, or braid a swinging tail. Carry spare covered elastics and small braid bands so you can make a quick repair between matches.
For accessories, check the rules used by your league or event before adding clips, headbands, beads, or ribbons. USA Volleyball provides its official rulebooks and interpretations; other competitions may use a different ruleset. Ask your coach or an official if an accessory is uncertain.
Frequently Asked Questions About Volleyball Hairstyles
What is a good hairstyle for volleyball if I cannot braid?
A compact bubble ponytail or triple stacked ponytail is a useful starting point. Both use elastics rather than braiding. If your front pieces are too short to reach the ponytail, try a permitted soft headband and check its hold during warm-ups.
Are braids or ponytails better for volleyball?
Braids are useful for incorporating front pieces and controlling loose length. Ponytails are usually simpler to make and repair. Combining a ponytail with a braided tail gives you both approaches. Choose the one that feels comfortable and keeps your view clear during practice.
How can I keep layers from falling out?
Start gathering the layers near their roots rather than expecting every piece to reach one elastic. French braids, Dutch braids, and stacked ponytails offer different ways to do this. A small amount of your usual styling product can help collect flyaways, but very short pieces may need a separate solution.
Which volleyball hairstyles work for curly hair?
Double braids, flat twists into a curly ponytail, and cornrows with a gathered finish are options to try. Match the sections to your curl pattern and length. You do not need to straighten your hair first or flatten every curl to create a practical sports hairstyle.
Can I wear my hair half up for volleyball?
A half-up style may work if the loose back section stays clear of your eyes and does not distract you during movement. For longer hair, gathering the full length is often more practical. Test your passing and serving positions before deciding.
Pick one easy style and one option for days when you have more time. Practice both, check how they feel through movement, and keep spare elastics in your volleyball bag. A hairstyle you can comfortably create and repair is a useful part of your game-day routine.

1 thought on “15 Volleyball Hairstyles With Secure Braids and Ponytails”