
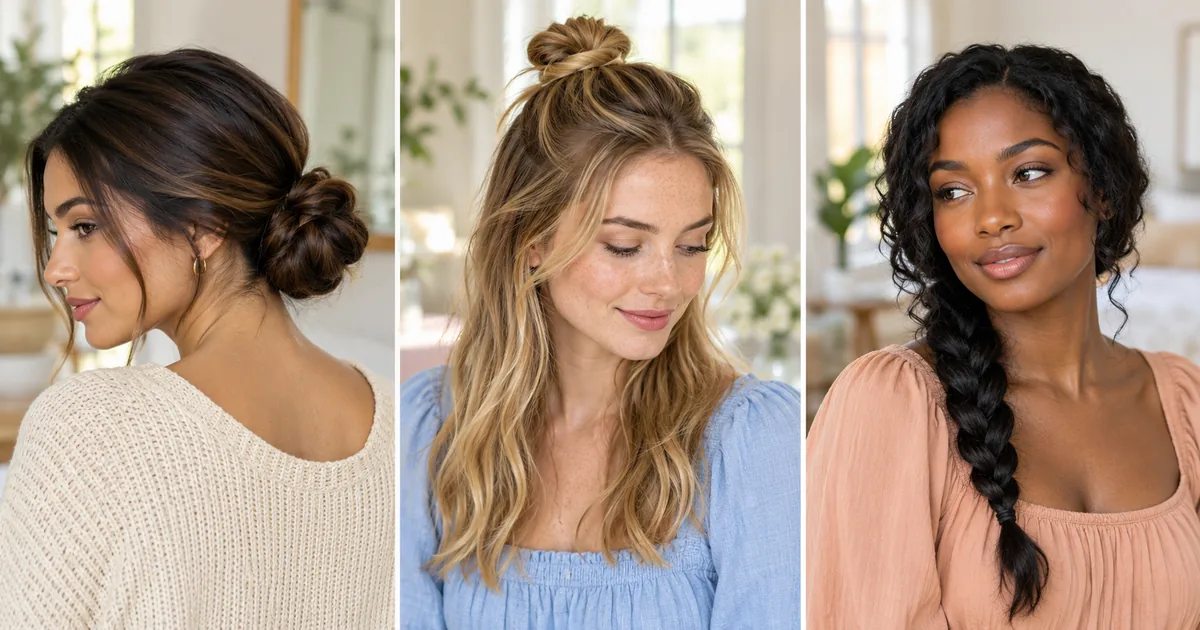
Your hair does not need a full styling session every time you leave the house. Sometimes, a small twist, a better-placed clip, or a loose braid is enough to make your usual look feel a little more finished.
The tricky part is finding cute hairstyles you can actually recreate before work, class, errands, or a coffee date. Those small details make a difference when you are standing in front of the mirror with limited time.
These 17 ideas include easy updos, ponytails, braids, and styles that leave most of your hair down. Some suit longer hair, while others work with a bob or natural curls. You can start with the simplest option and practice the more detailed styles when you have extra time.
1. Low Twisted Bun With Soft Face Framing Pieces
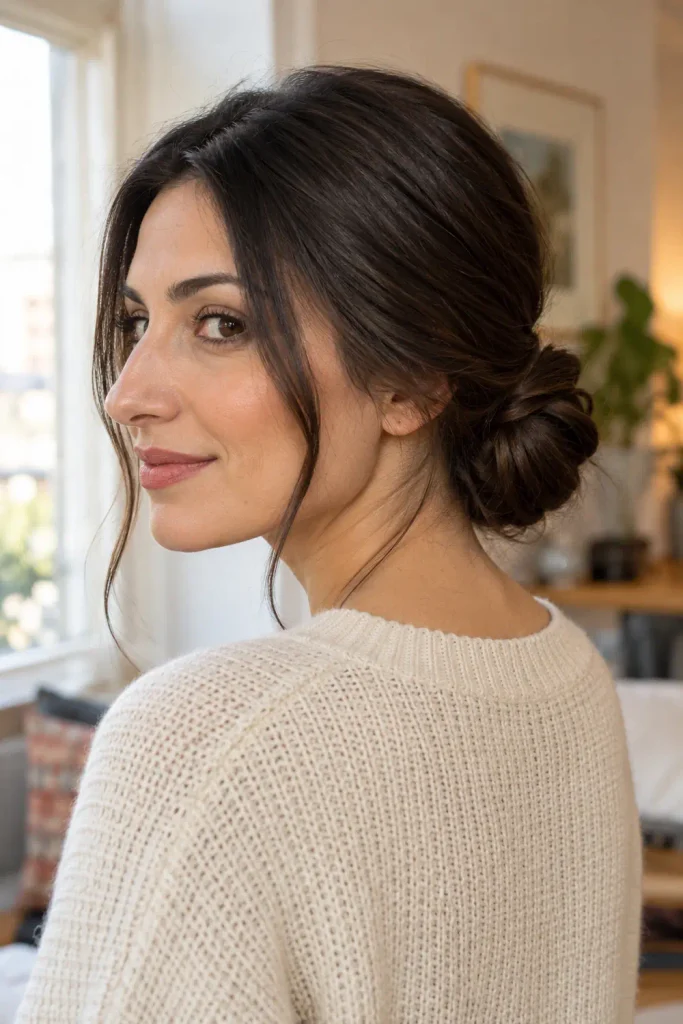
A low bun keeps your hair gathered while leaving room for a softer finish around your face. It works best when your hair reaches a low ponytail with enough length left to wrap around the base.
Simple steps:
- Leave out two small front pieces, then gather the rest at your nape.
- Secure a low ponytail with a hair tie.
- Twist the ponytail and wrap it around the base.
- Tuck the ends underneath and secure the bun with bobby pins.
Loosen the hair above the tie slightly if the crown looks flat. Keep the front pieces small so they do not fall across your eyes while you work.
2. Half Up Ponytail With a Small Ribbon
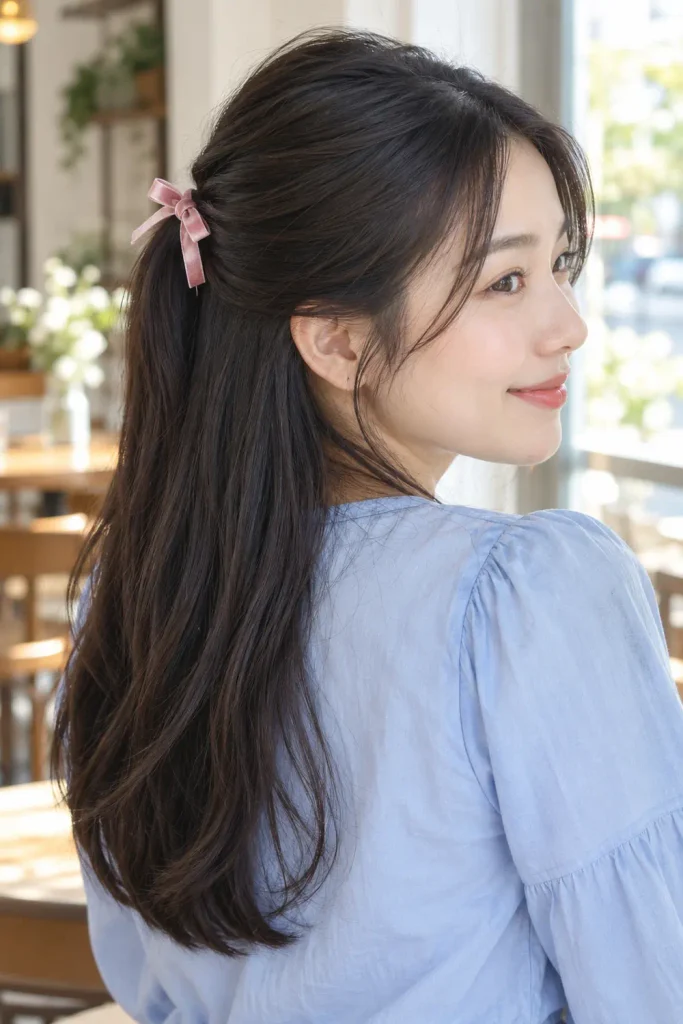
A narrow ribbon gives a basic half-up ponytail a clear finishing detail. Keep the bow small enough that the hairstyle still feels casual with a T-shirt or cardigan.
Simple steps:
- Take a section of hair from above each ear.
- Bring both sections together at the back of your head.
- Secure them with a small hair tie.
- Tie a ribbon around the elastic, then adjust the bow loops.
Let your natural waves or curls stay loose underneath. The elastic should hold the hairstyle on its own, so you do not need to pull the ribbon tightly to keep everything in place.
3. Claw Clip French Twist for Busy Mornings
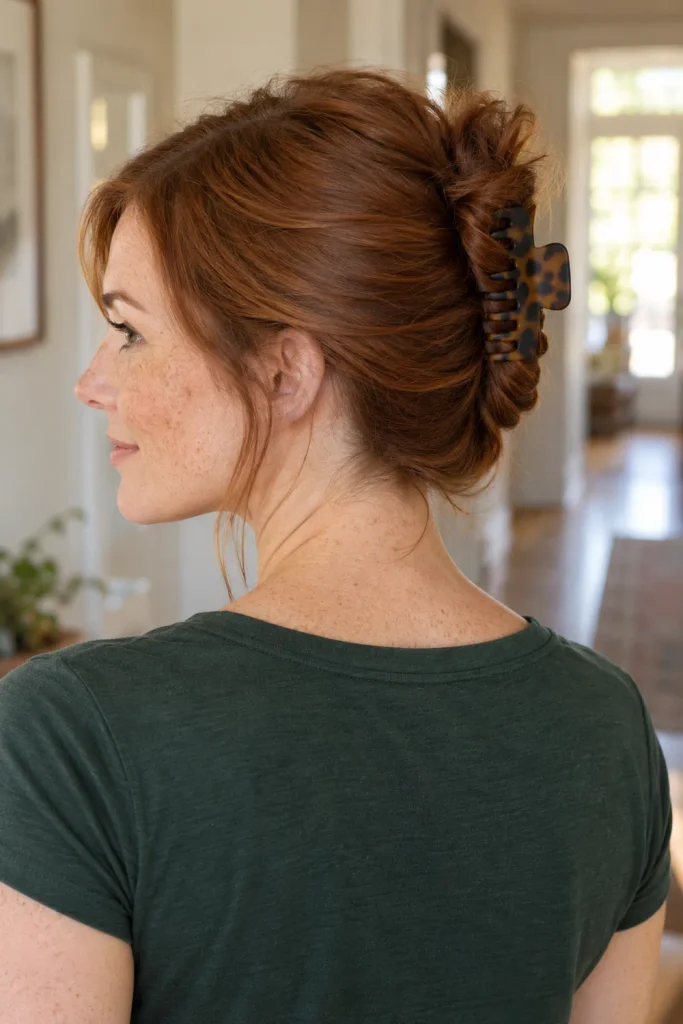
Choose a clip that can hold the full thickness of your hair. A small decorative claw might close around the ends but leave the twist underneath slipping out.
Simple steps:
- Gather your hair at the nape as though making a low ponytail.
- Twist the gathered hair, then lift it upward against your head.
- Fold any extra length back down along the twist.
- Close the claw clip over the twist, catching hair on both sides.
Leave a few ends showing above the clip for a relaxed finish. For very long hair, fold the length again before clipping instead of letting a heavy tail hang loose.
4. Loose Side Braid With a Fuller Finish
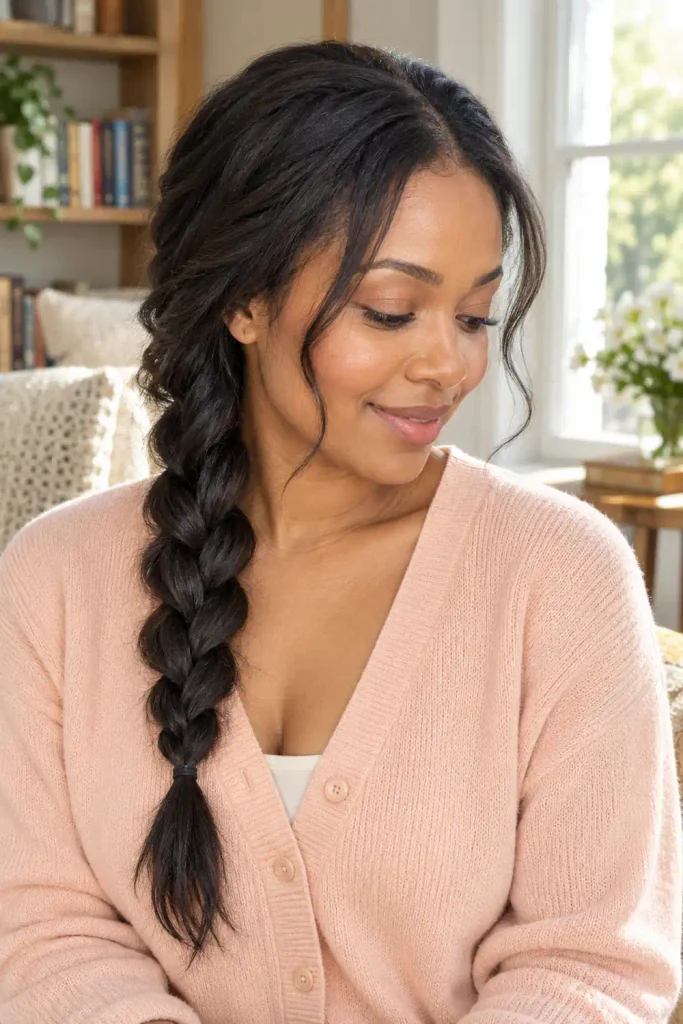
Pulling all your hair over one shoulder makes an ordinary braid easier to see while you work. This is a useful choice when you want your lengths gathered without making an updo.
Simple steps:
- Bring your hair to one side and divide it into three sections.
- Cross the right section over the middle, then the left over the new middle.
- Repeat down the length and secure the ends.
- Gently pull the outer edges of each braid loop to widen it.
Hold the hair tie while loosening the braid. Small adjustments give a fuller shape without pulling shorter layers completely out.
5. Bubble Ponytail With Evenly Spaced Sections
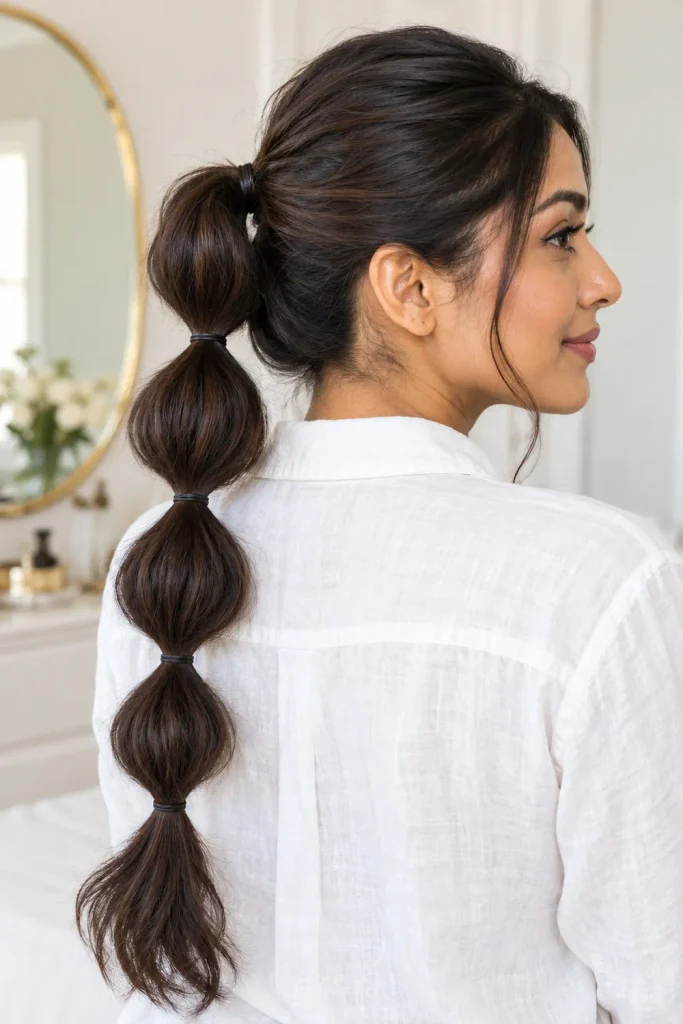
The rounded sections do the work here, so you do not need to know how to braid. Medium or long hair gives you more room to create several bubbles.
Simple steps:
- Gather your hair into a mid-height ponytail and secure it.
- Add another hair tie a short distance below the first.
- Gently pull the hair between the ties outward into a rounded shape.
- Repeat down the ponytail, leaving the ends loose.
Check the spacing before widening each section. Keep the bubbles smaller on layered hair so the shorter ends stay tucked inside rather than sticking out around every elastic.
6. Two Mini Front Braids With Your Hair Down
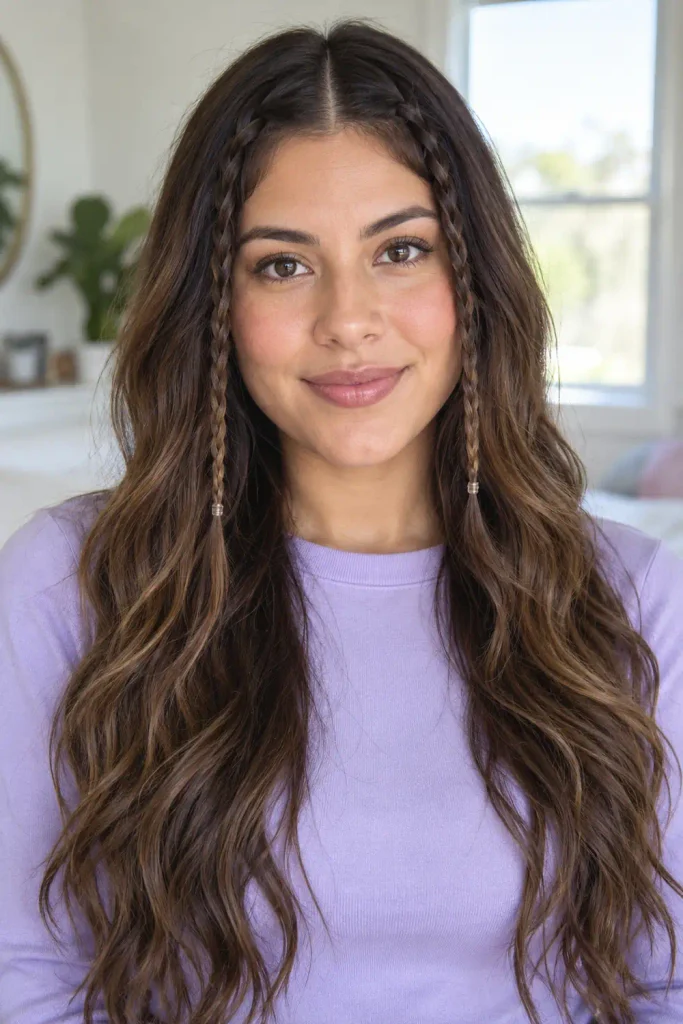
Two narrow braids frame your face while the rest of your hair stays loose. They also give a plain middle part a little detail without needing a full restyle.
Simple steps:
- Make your usual part and separate a small section beside it on each side.
- Divide one section into three smaller strands.
- Make a regular braid down the length and secure the end.
- Repeat on the other side, keeping the width similar.
Let the braids sit naturally beside your face instead of pulling them tightly backward. Small elastics close to your hair color keep the focus on the braided detail.
7. Half Up Top Knot That Keeps Hair Off Your Face
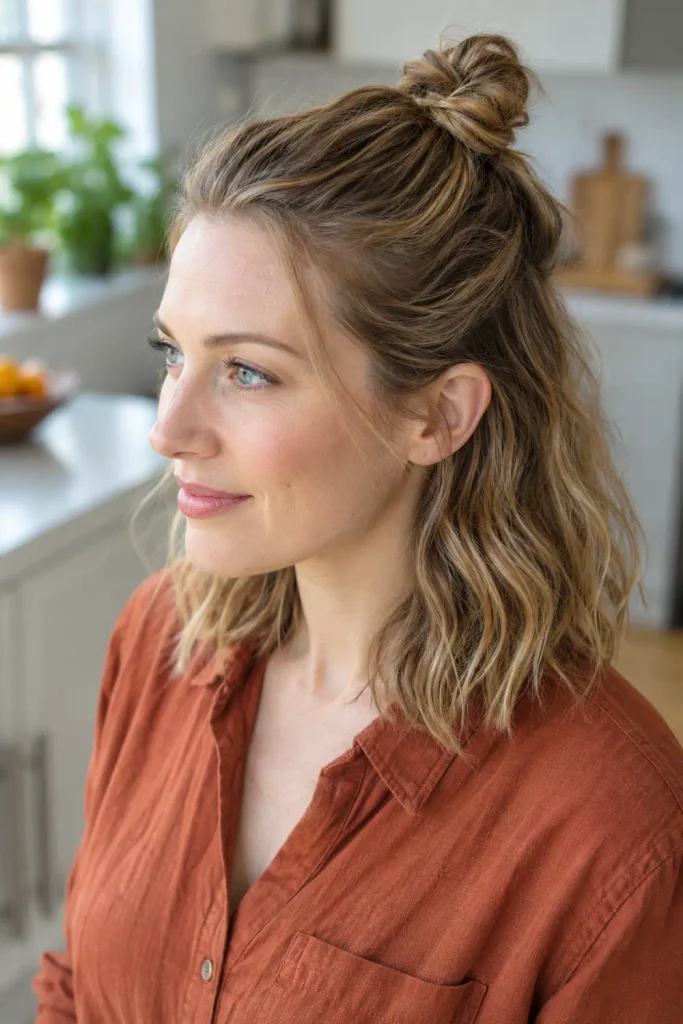
Gather only the top section for this style. Taking too much hair can make the bun heavy and leave the loose lengths underneath looking thin.
Simple steps:
- Section off the hair above your temples and bring it toward the crown.
- Secure it into a small ponytail.
- Twist the ponytail loosely and wrap it around its base.
- Pin the ends beneath the bun or use a second elastic to hold it.
A slightly uneven knot suits an everyday outfit. If your hair is short, make a small loop bun by leaving the ends partly pulled through the elastic on the final wrap.
8. Tucked Low Ponytail With a Simple Flip Through Detail
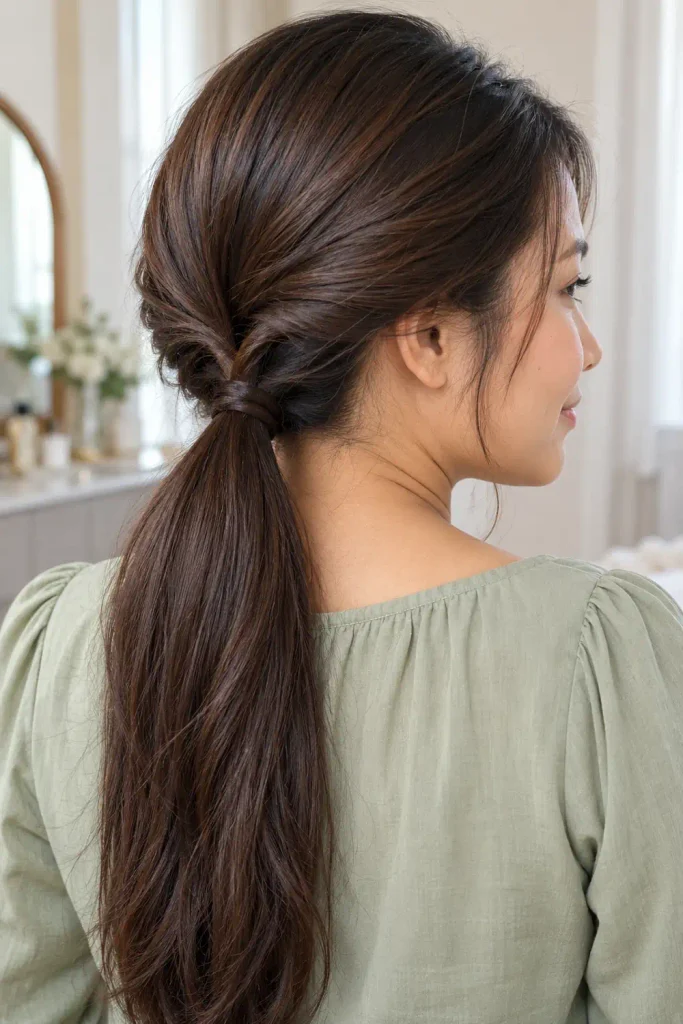
A single flip gives a low ponytail two soft twists near the base. This works best when you leave a little space above the elastic rather than fastening it right against your scalp.
Simple steps:
- Secure a low ponytail and slide the tie down slightly.
- Use your fingers to make an opening in the hair above the tie.
- Lift the ponytail up and pass it down through that opening.
- Pull the ponytail gently to settle the twists.
Separate the loose tail afterward if it becomes tangled during the flip. A small elastic is easier to tuck beneath the twisted sections than a bulky scrunchie.
9. Double Low Buns With a Relaxed Finish
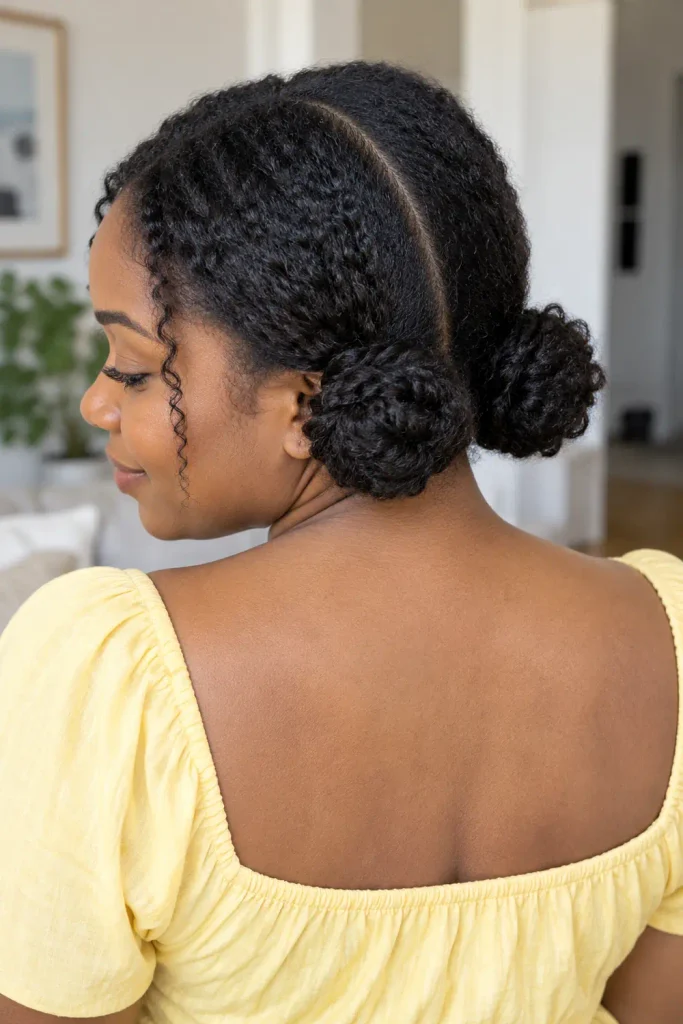
Two low buns create a playful shape without piling your hair on top of your head. Position them behind your ears so they stay clear of your face.
Simple steps:
- Part your hair down the middle, continuing the part through the back.
- Gather each half into a low ponytail.
- Twist one ponytail, wrap it around its base, and pin the ends.
- Repeat on the other side, checking that both buns sit at a similar height.
The buns do not need to match exactly. On shorter hair, use two loop buns and pin the stray ends around each elastic for a softer finish.
10. Side Swept Hair Secured With Crossed Bobby Pins
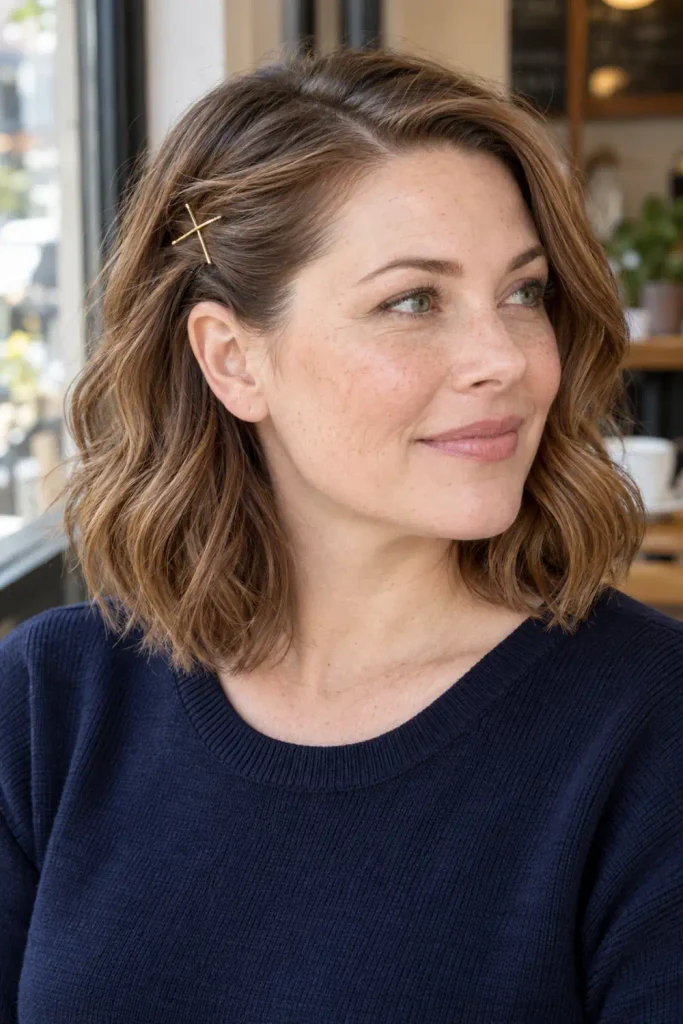
You can change the outline of your usual hairstyle without gathering all your hair. A side part and two visible pins are enough to create an intentional detail.
Simple steps:
- Make a side part and arrange your hair as you normally wear it.
- On the side with less hair, sweep the front section back toward your ear.
- Slide in one bobby pin to hold that section.
- Add a second pin across the first to form an X.
Catch some hair underneath the swept section when inserting the pins. Keep both pins against your head so the ends do not stick outward.
11. High Curly Puff That Shows Your Natural Texture
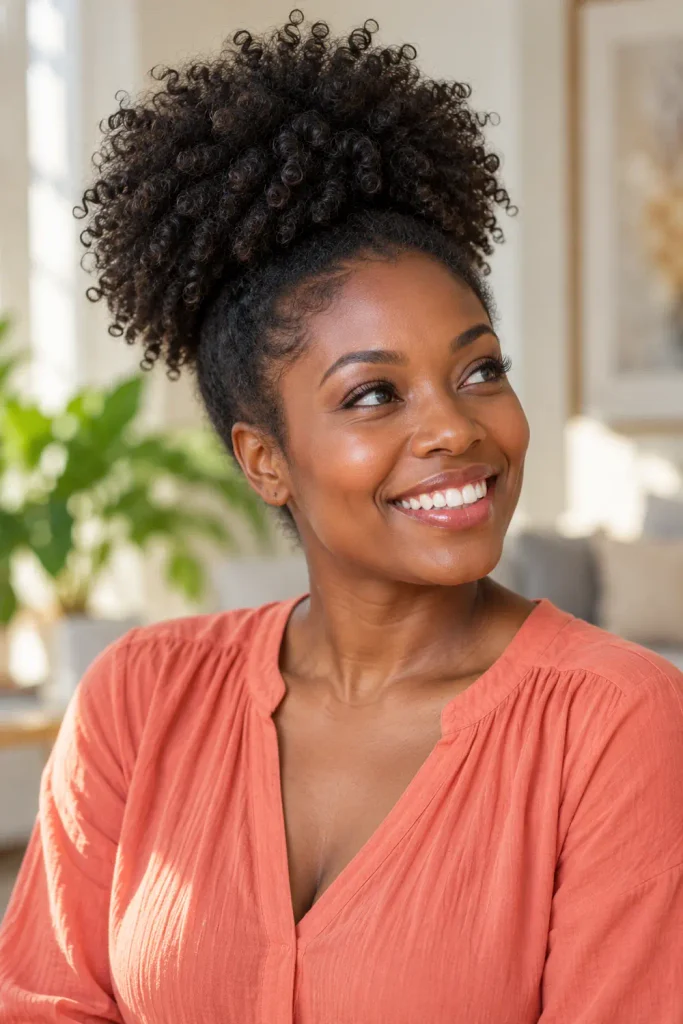
Natural curls provide the shape for a high puff. You are gathering the roots while leaving the curl pattern visible through the ends.
Simple steps:
- Start with detangled hair and separate any curls that need adjusting.
- Gather your hair upward with your hands.
- Secure the base with a soft, stretchy band that holds without pulling tightly.
- Arrange the puff with your fingers, lifting flattened areas gently.
Use a larger band rather than forcing thick hair into a small elastic. You can leave the hairline softly textured, and the puff does not need to be completely round to look finished.
12. Braided Headband Made With Two Small Side Braids
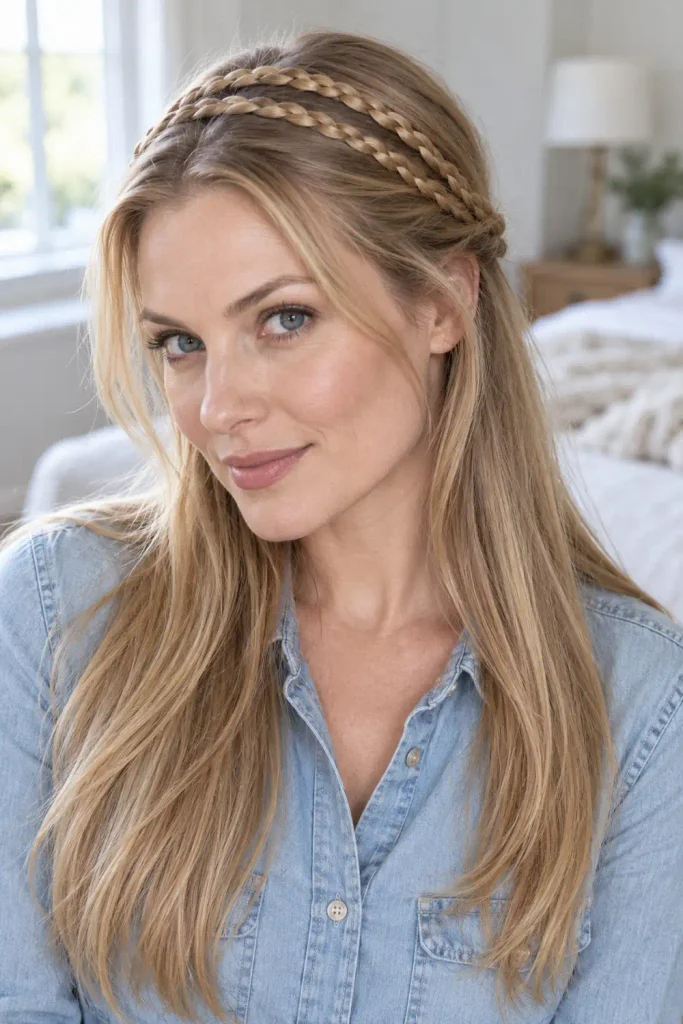
Two slim braids can form a headband across the crown while the rest of your hair stays down. You will need enough length for the braids to reach over your head.
Simple steps:
- Take a narrow section of hair from just behind each ear.
- Braid both sections and secure their ends with small elastics.
- Bring one braid over the crown toward the opposite ear and pin it.
- Bring the second braid across nearby, then tuck and pin the ends underneath.
Keep the sections slim so the braids lie comfortably. If they do not reach across, pin them toward the back for a partial braided headband.
13. Scarf Headband With a Loose Low Ponytail
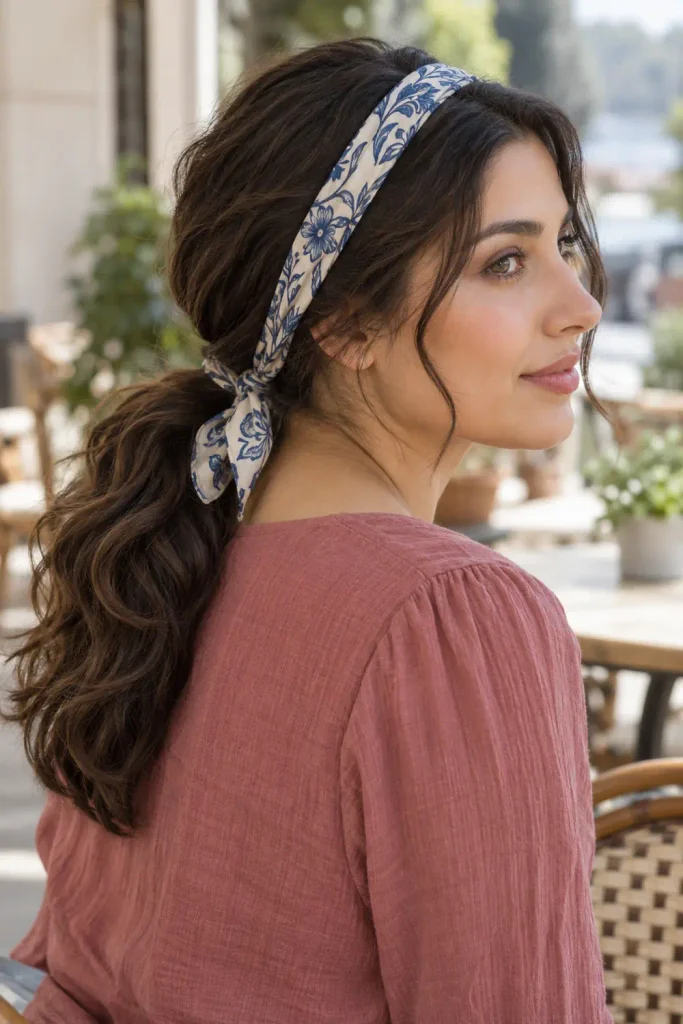
A scarf can bring color or pattern into your hairstyle without extra braiding. Fold it into a narrow band so it sits neatly behind your hairline.
Simple steps:
- Gather your hair into a loose low ponytail and secure it.
- Fold a small scarf lengthwise until it forms a flat band.
- Place the middle of the band over your head, just behind the hairline.
- Tie the ends at the nape, underneath the ponytail.
Keep the knot small if you will be wearing a collared jacket. If the scarf slides backward, anchor it discreetly with a bobby pin above each ear.
14. Two Flat Twists Gathered Into a Low Bun
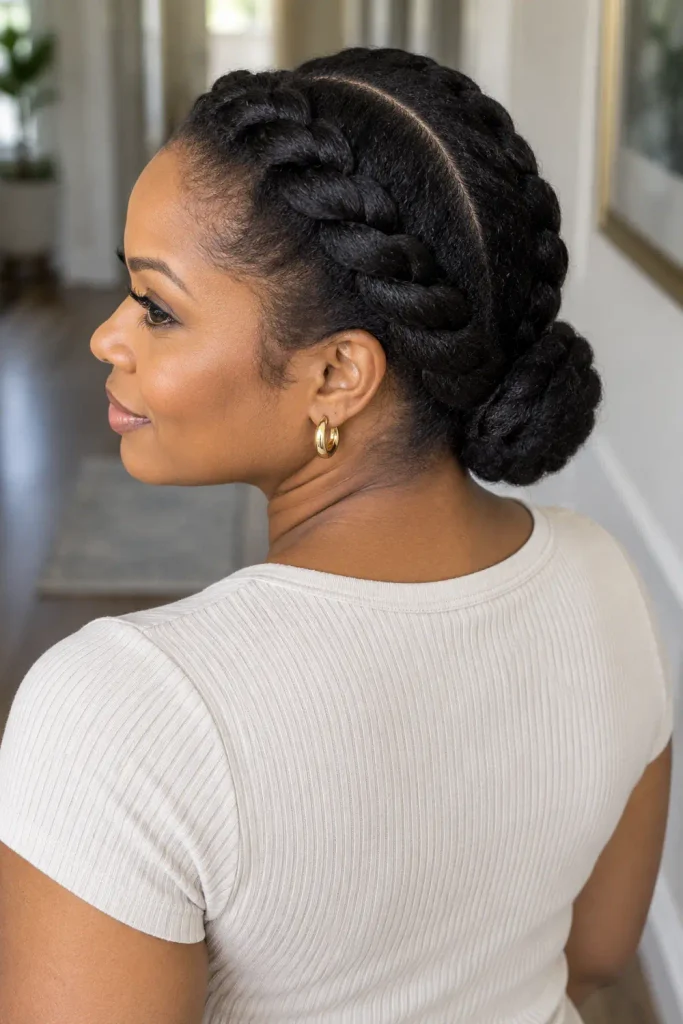
Flat twists give the front of your hair structure before it reaches the bun. They take some practice, but the repeated motion becomes easier once you learn to add small sections consistently.
Simple steps:
- Part your hair down the middle and clip one half aside.
- Take a small front section from the other half and divide it into two strands.
- Cross the strands, adding a little loose hair to the lower strand before each new crossing, and work toward the nape.
- Secure the twist, repeat on the other side, then gather the remaining lengths into a low bun.
Work with detangled sections and keep the twists comfortably loose at the roots.
15. Half Up Fishtail Braid With Loose Ends
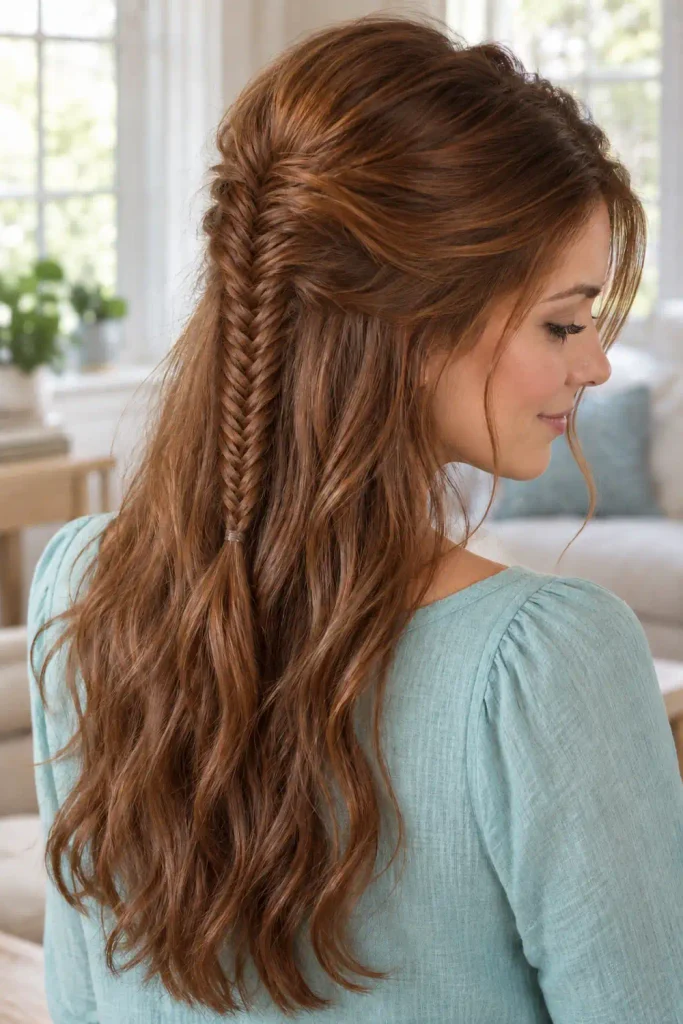
A fishtail has a finer woven pattern than a regular braid. Using only the upper section of your hair makes the technique easier to practice without managing your full length.
Simple steps:
- Gather the top section into a half-up ponytail and secure it.
- Divide that ponytail into two equal halves.
- Take a thin strand from the outside of one half and cross it into the other half.
- Repeat on alternating sides, then secure the braid and leave a short tail.
Use slightly larger strands while learning. Smaller strands create more detail but require more crossings to reach the ends.
16. Short Bob With One Side Twisted and Pinned
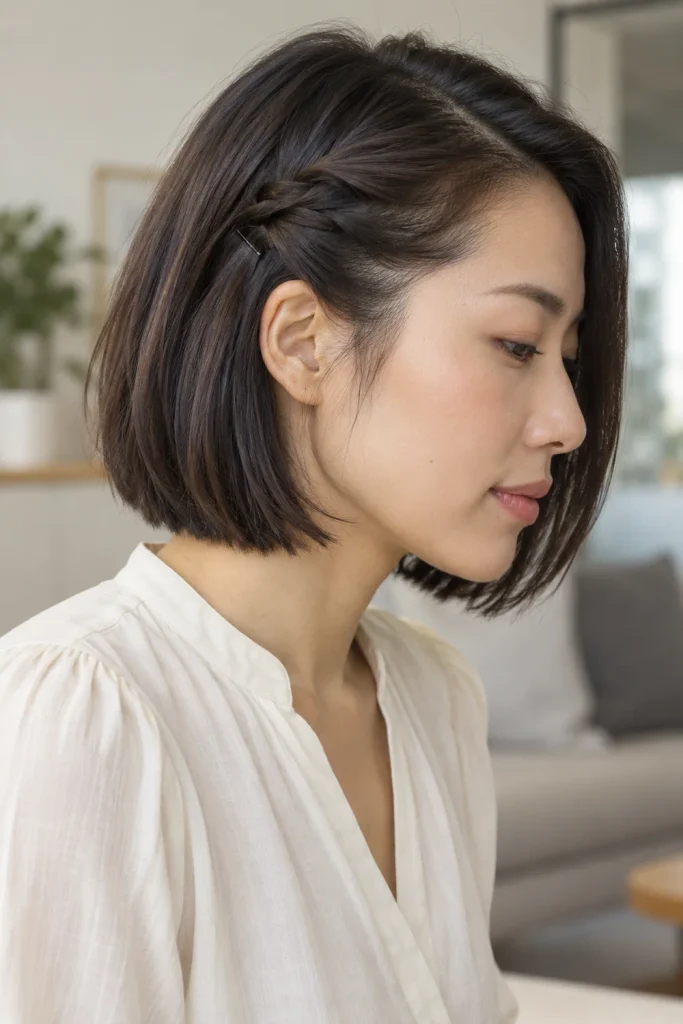
A bob does not need to fit into a ponytail to have styling options. A small twist beside your part changes the front while keeping the haircut’s shape visible.
Simple steps:
- Make a side part and take a small section near your temple.
- Twist the section backward, away from your face.
- Add a little nearby hair as you continue toward the top of your ear.
- Secure the twist with a bobby pin tucked into its underside.
Stop before the shorter layers become difficult to catch. A decorative clip can cover the pin, or you can leave the twist as the only detail.
17. Rope Braid Ponytail With a Wrapped Hair Tie
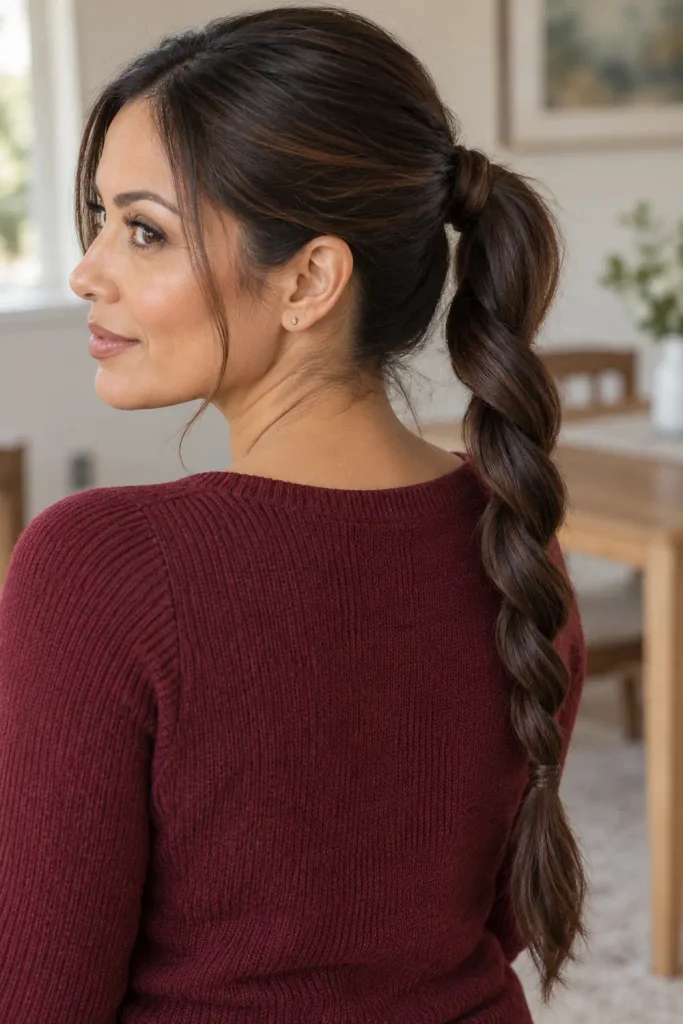
The rope effect depends on twisting the strands one way and winding them together the opposite way. That opposing motion helps the two sections stay intertwined.
Simple steps:
- Secure a ponytail, leaving one narrow strand aside from the tail.
- Wrap that strand around the elastic and pin its end underneath.
- Divide the remaining ponytail into two sections and twist each clockwise.
- Wind the two sections around each other counterclockwise, then secure the ends.
Keep both sections twisted as you work down the length. If the rope opens immediately, check the twisting directions before tightening the final elastic.
Find a Few Styles You Can Repeat
The most useful cute hairstyles are the ones that fit your hair and your morning routine. Pick one style for wearing your hair down, one for gathering it back, and one for days when you want a little extra detail. That gives you a small rotation without needing a different technique every morning.
Start with the clip twist or tucked ponytail, then practice the braids when you have more time. Adjust the section sizes and accessories to suit your length. Save this list on Pinterest so the steps are easy to find the next time your usual hairstyle feels repetitive.

3 thoughts on “17 Cute Hairstyles With Simple Steps for Everyday Wear”