
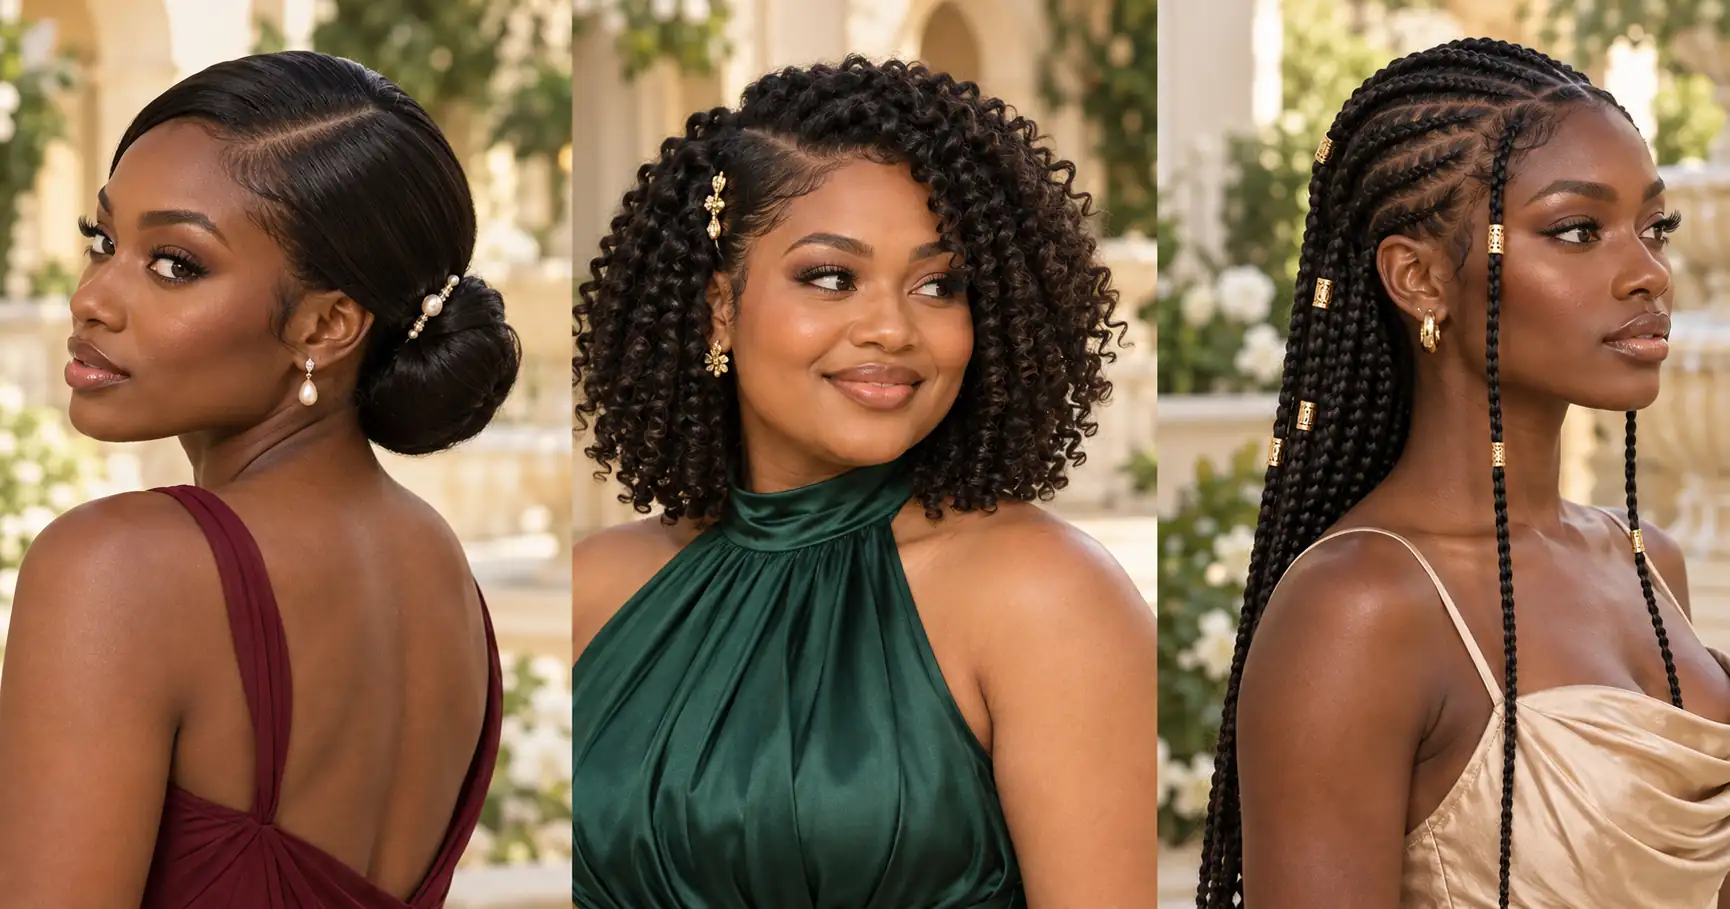
Your homecoming hairstyle needs to look good in the first photo and still feel comfortable when the dance floor fills up. That can make choosing a look harder than choosing your dress. A bun might hide the detail you wanted to show, loose curls might catch on your earrings, and a new style can take longer than you planned.
The best homecoming hairstyles Black women leave room for your texture, your hair length, and the way you actually want to spend the evening. Natural coils, braids, locs, short cuts, and straightened styles all have a place. You do not need extra length or a completely new look to make your hair feel dressed up.
These 19 ideas include styling notes on shape, accessories, and small finishing details. Some work with a style you already wear. Others are worth taking to your stylist before the event. Start with the hairstyles that suit your current hair, then think about your neckline and earrings. A quick practice run can help you spot an awkward pin or an uncomfortable ponytail before homecoming night.
1. Sleek Low Bun With a Deep Side Part
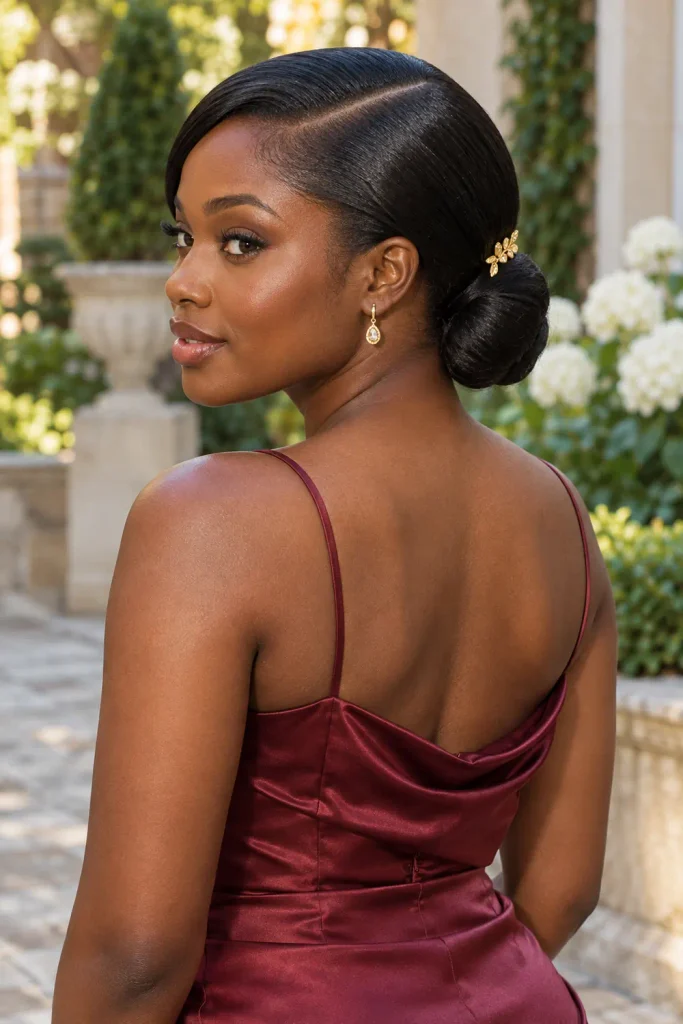
A low bun leaves your shoulders clear and gives statement earrings room to show. The deep side part brings a little asymmetry to the smooth finish, especially with a simple satin dress.
Create the part before gathering your hair at the nape. Shape the lengths into a tucked bun, then pin the ends underneath. Hair should feel secure without needing to be pulled tight.
Styling notes:
- Position the bun above your collar so it does not rub against the fabric.
- Use a light layer of your usual smoothing product instead of piling on gel.
- Place one decorative pin beside the bun if your dress has minimal detail.
2. Side Part Twist Out With Defined Curls
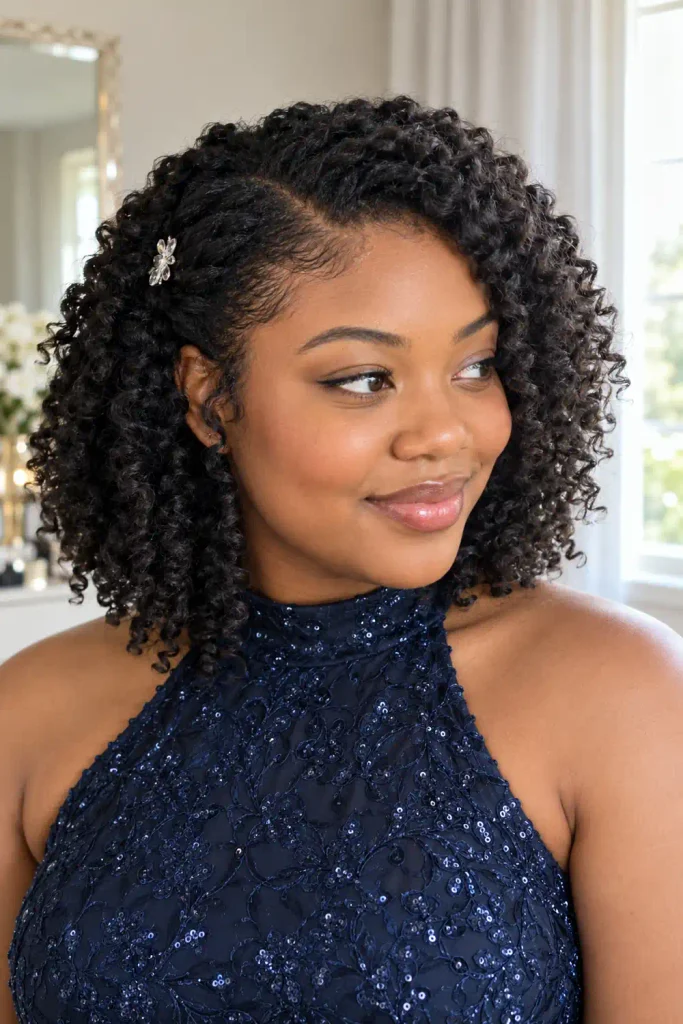
Defined curls and a soft side part give a twist-out enough shape for homecoming without losing its fullness. One side can sit closer to your face while the other opens up around an earring.
Set the twists ahead of time and let them dry completely before taking them down. Unravel each twist carefully, then separate only where the curl naturally divides. Lift the roots gently rather than combing through the ends.
Styling notes:
- Keep the front curls slightly more defined than the back.
- Slide a small clip above one ear for an asymmetric finish.
- Make the part during the setting stage so you do not have to reshape everything later.
3. Braided Crown With Soft Face-Framing Pieces
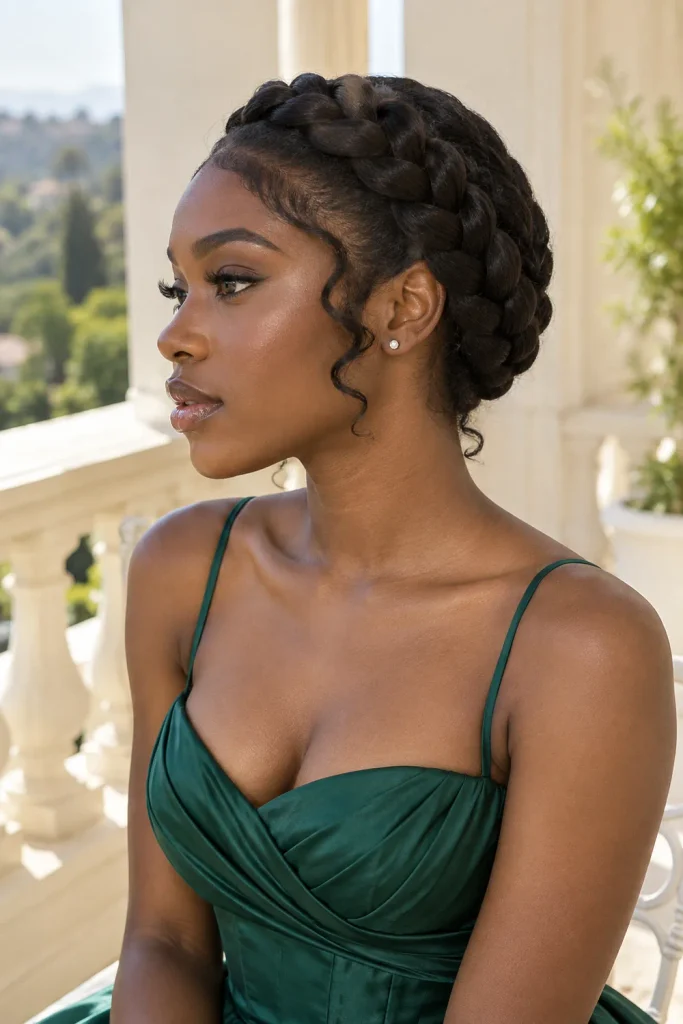
A braid that follows the hairline creates a crown shape while keeping most of your hair off your neck. Leave a small curl or twist near each temple if you want a softer outline.
The braid can be made with your own hair or adapted with added hair for a fuller shape. Ask your stylist to tuck the joining point underneath so the crown looks continuous in photos taken from behind.
Styling notes:
- Keep any loose front pieces short enough to stay clear of lip gloss.
- Choose small earrings when the braid sits close to your ears.
- Check the finished style from both sides, especially where the braid ends meet.
4. Finger Waves for a Short, Sculpted Look
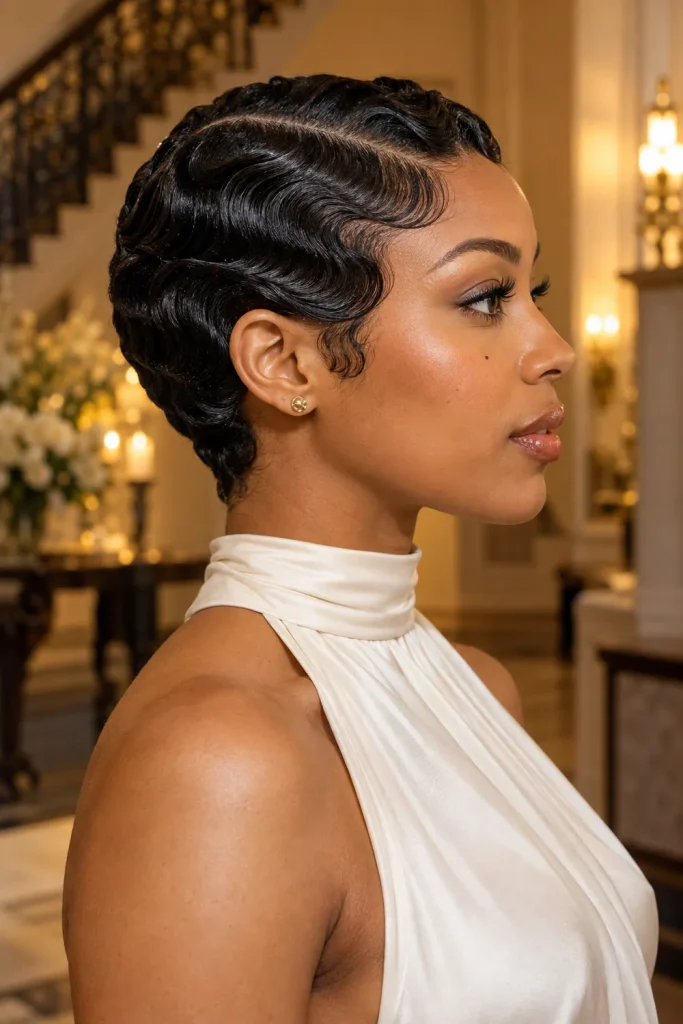
Short hair does not need added length to look formal. Finger waves use curved ridges and a close-fitting shape to make the cut itself the main detail.
This look is easiest to plan with someone who knows how to work with your hair’s texture and current finish. Bring a reference showing the wave pattern you want, since a soft curve looks different from sharply defined ridges. Let the style set fully before changing clothes.
Styling notes:
- Put on your dress before styling if it must be pulled over your head.
- Keep accessories small so the wave pattern stays visible.
- A side part can help guide the direction of the front waves.
5. High Natural Puff With a Velvet Headband
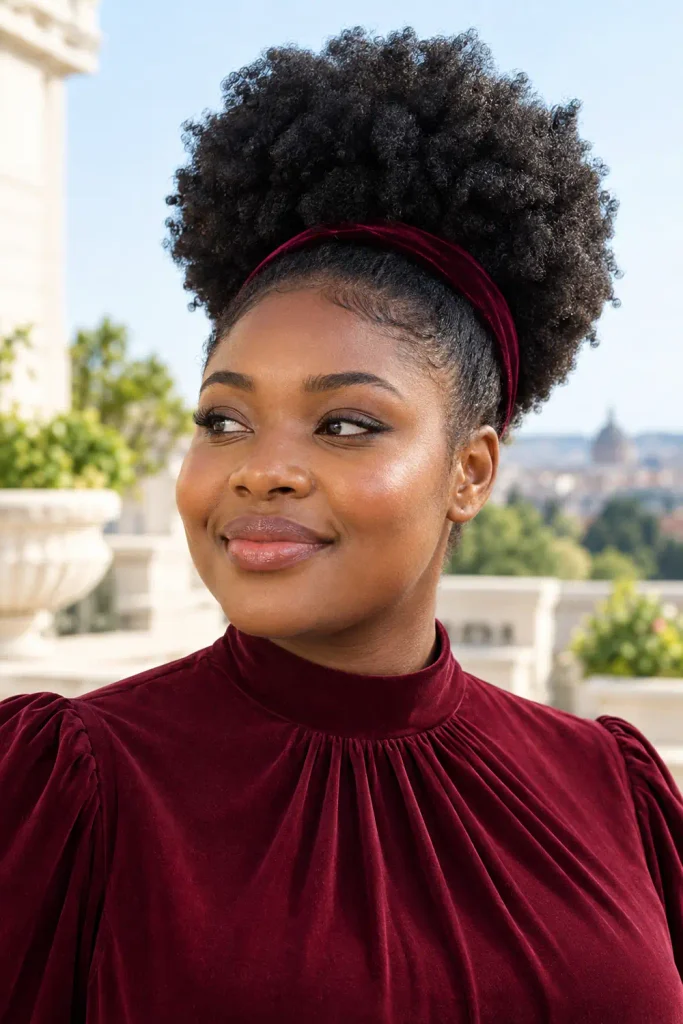
A full puff gives your natural texture the spotlight. A narrow velvet headband brings in a dressy detail without covering the shape of your coils.
Gather your hair toward the crown with an adjustable band or soft tie. Arrange the puff with your fingers, checking the sides as well as the front. Stop tightening once the base feels secure. The fullness should come from the hair, not from pulling the band harder.
Styling notes:
- Choose a headband that rests comfortably behind your ears.
- Match its color to your shoes or bag for a subtle connection.
- Leave the hairline softly brushed if a slick finish is not your preference.
6. Half Up Curls With a Small Crown Ponytail
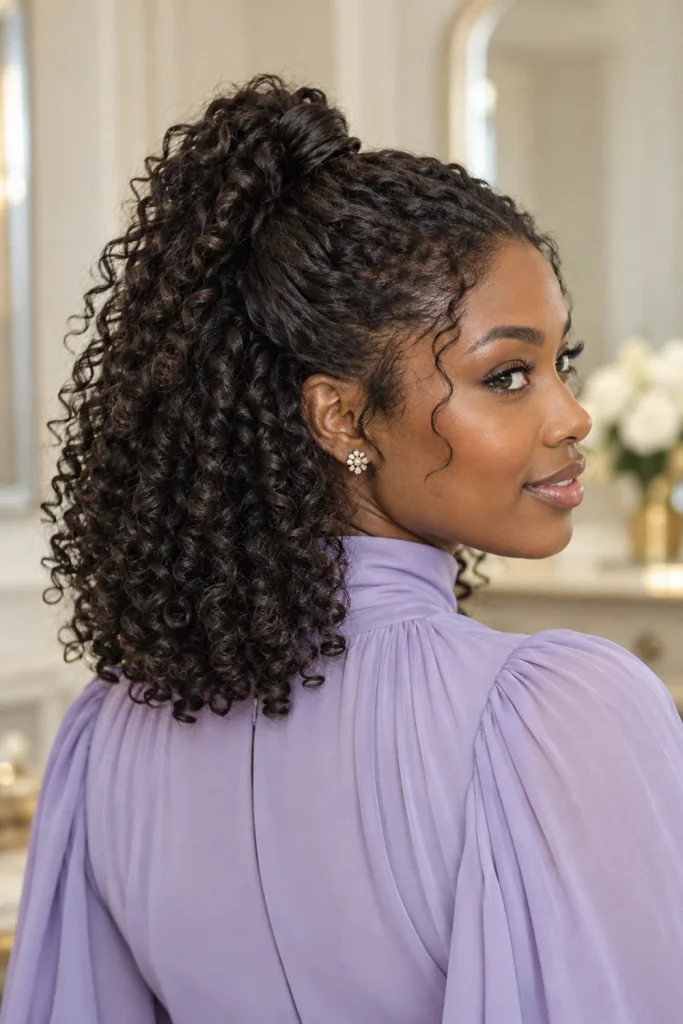
Keep curls around your shoulders while lifting the front away from your face. A small crown ponytail gives this half-up style height without using most of your hair in the top section.
Separate the upper section near your temples, secure it gently, and arrange the loose curls underneath. A narrow strand wrapped around the tie can make the base look more finished. Check that the ponytail does not flatten the curls below it.
Styling notes:
- Take less hair into the ponytail if the bottom section looks sparse.
- Use a small bow with a plain dress, or skip it with a detailed neckline.
- Test the style with your earrings before leaving.
7. Side Swept Knotless Braids With Gold Cuffs
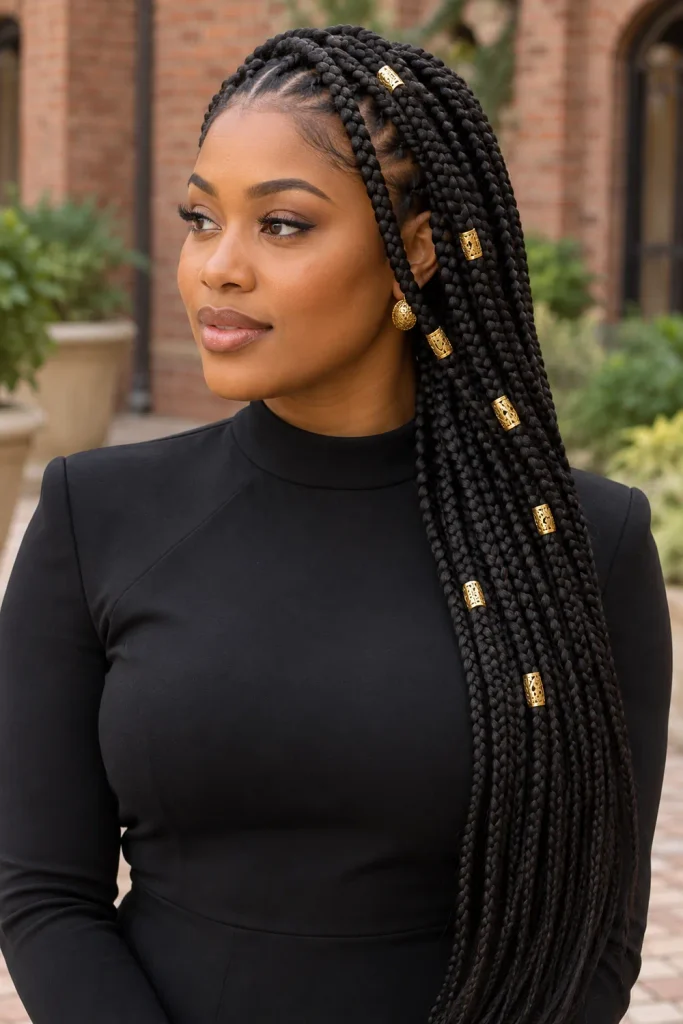
Existing knotless braids can feel different for homecoming with a side sweep and a few well-placed cuffs. There is no need to decorate every braid to make the look noticeable.
Move the front braids across one shoulder and secure a small section behind the opposite ear. Let the lengths fall freely instead of pulling the whole style into a tight bundle. Add cuffs where they will show in a front or three-quarter photo.
Styling notes:
- Keep the cuffs concentrated around the face or upper lengths.
- Leave space between metal details so they do not look crowded.
- Check that the swept braids sit comfortably when you turn your head.
8. Flexi Rod Curls Shaped Into a Rounded Bob
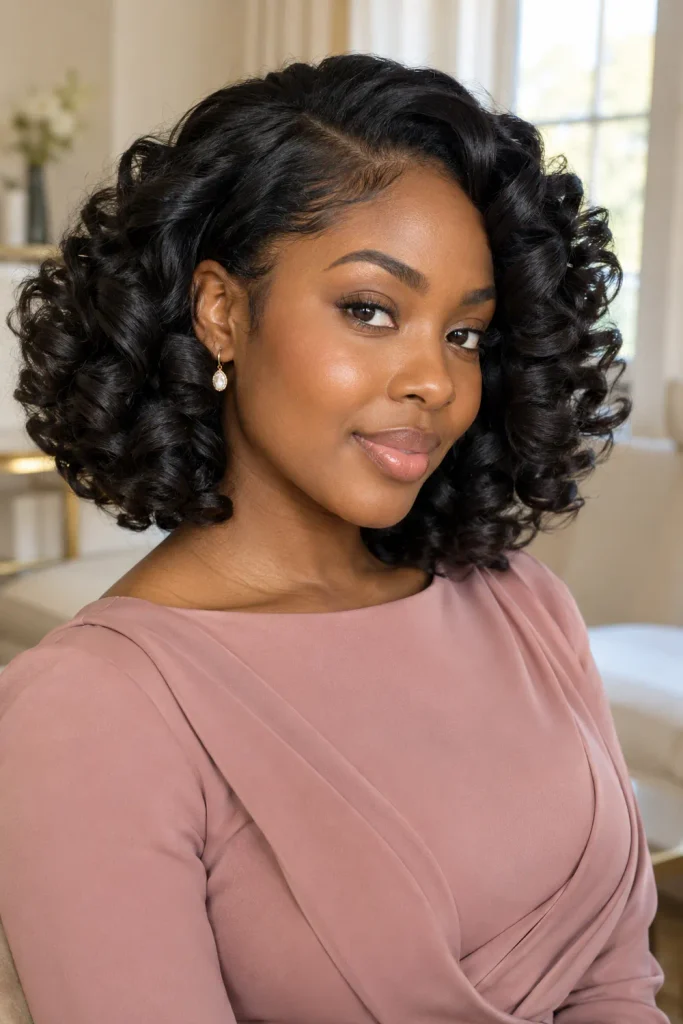
A rounded bob of springy curls creates a compact shape that sits neatly around the jaw or shoulders. It is a useful choice when you want movement without long curls hanging over your dress.
The finished length depends on your starting length and how tightly the curls form. Let the rod set dry fully, remove the rods gently, and separate the curls a little at a time. Shape the outline before adding an accessory.
Styling notes:
- Use a side part if you want more fullness on one side.
- Tuck one side behind your ear to show a small drop earring.
- Avoid separating every curl if you prefer a clearly defined finish.
9. Flat Twist Updo With a Tucked Back
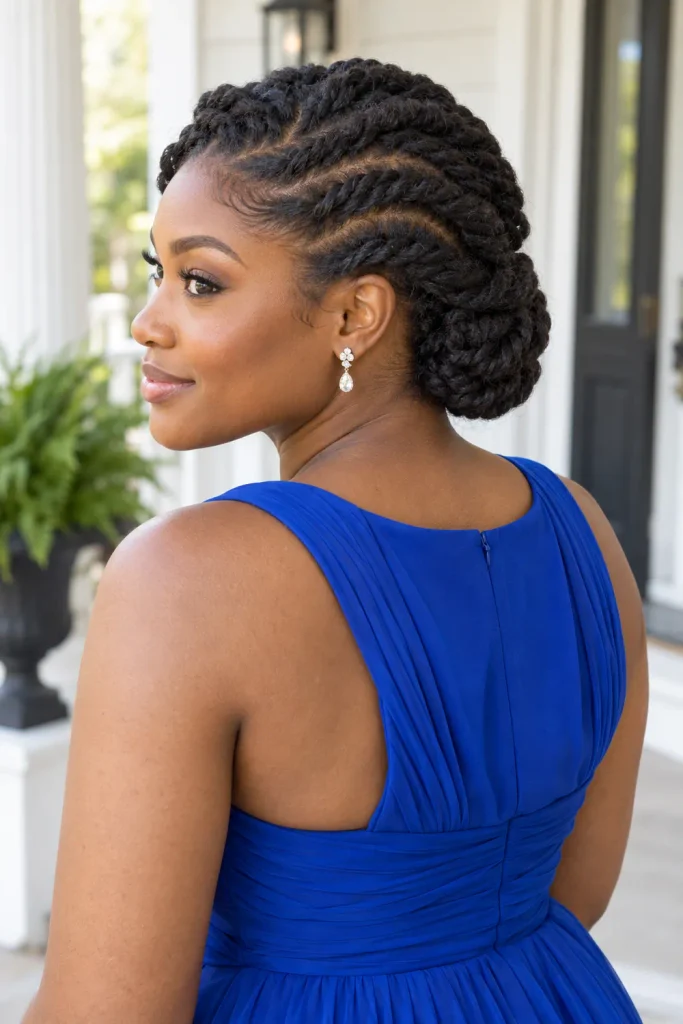
Flat twists bring visible detail to an updo without needing loose curls or shiny accessories. The twists can travel from the front and sides toward a tucked section at the back.
Choose the pattern before styling. Straight rows give a clean outline, while curved sections create a softer design. Pin the ends into a low roll or small tucked bun, depending on your length. A photo of the back is useful for checking the finished shape.
Styling notes:
- Ask for comfortable tension around the temples.
- Tuck pins inside the roll rather than leaving their ends exposed.
- Wear this with an open back or detailed collar to keep the fabric visible.
10. Silk Press With a Side Part and Curled Ends
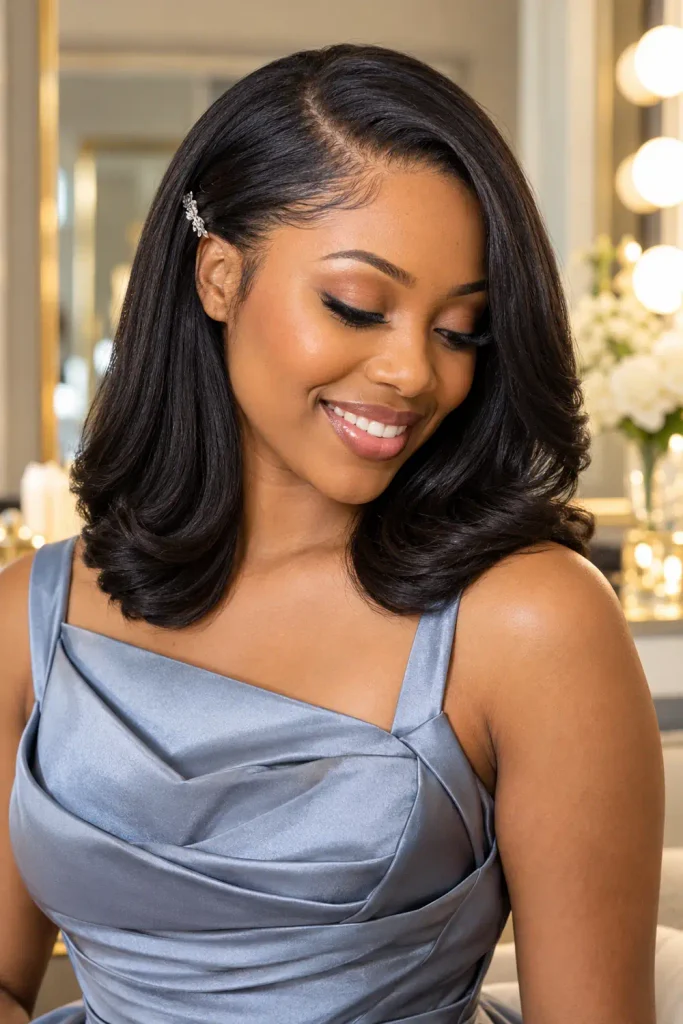
A side part and a gentle bend at the ends give straightened hair a clear shape. You can turn the ends inward for a rounded outline or outward for a small flip.
Plan the finish with your stylist rather than repeatedly reshaping it while getting ready. The amount of movement will depend on your cut, length, and how your hair responds to the styling. Leave enough time to check how the ends sit against your dress.
Styling notes:
- Apply heat protectant according to its directions before heat styling.
- Keep heavy oils away from the finished lengths if they weigh your hair down.
- A tiny clip on the smaller side of the part can show off an earring.
11. Loc Petal Bun With a Decorative Hairpin
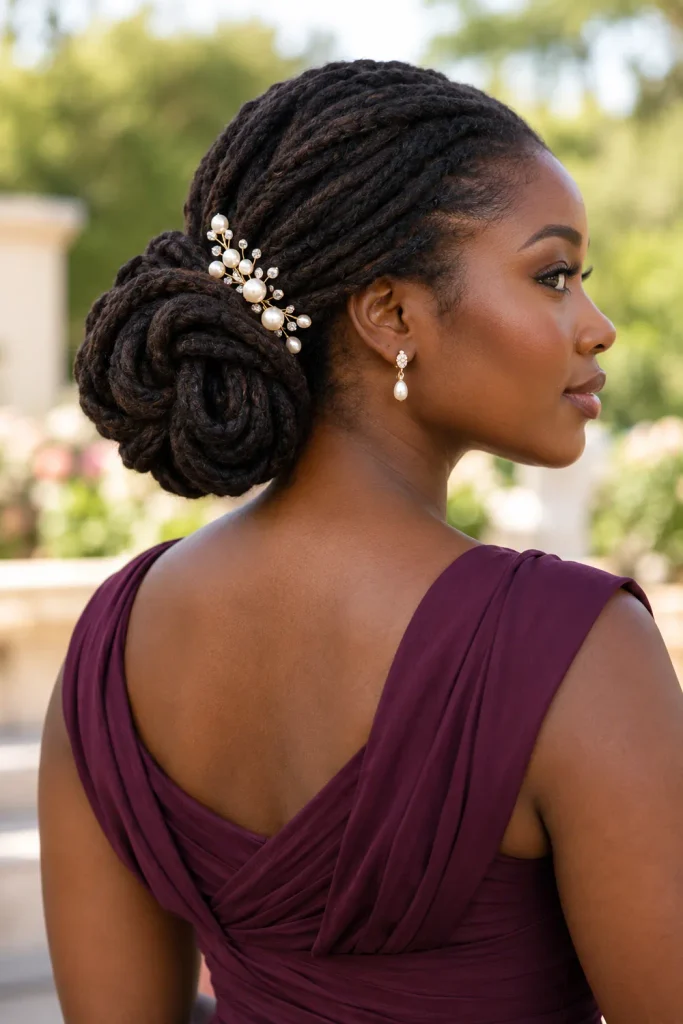
Looped locs can form a petal-like bun with a sculpted outline. The visible loops give the style detail even before you add jewelry.
Gather locs where you want the bun to sit, then fold and secure small groups into rounded loops. The size and placement depend on your loc length, thickness, and weight. Longer or heavier locs may be more comfortable in a lower bun. A stylist can help distribute the shape evenly.
Styling notes:
- Place a decorative pin beside the loops rather than through the main support.
- Keep the bun clear of a high collar.
- Turn your head and look up during a trial to check comfort.
12. Bantu Knot Out With Soft, Separated Curls
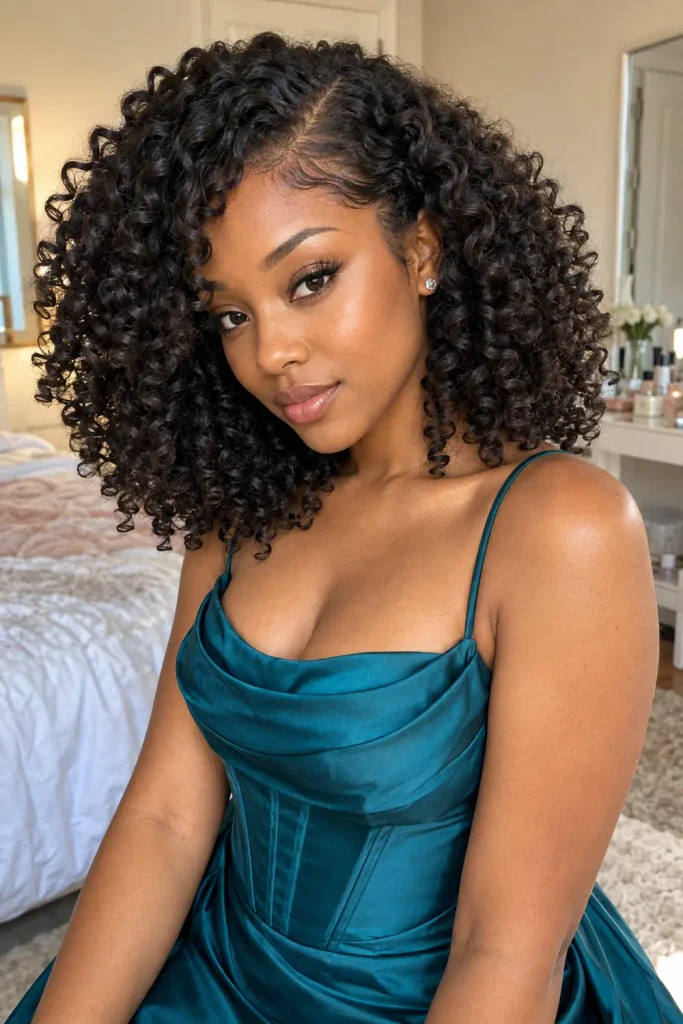
A Bantu knot-out creates curls that you can arrange into a full, loose shape. It suits a homecoming look where the hair’s movement matters more than a sharply fixed outline.
Make the knots ahead of the event and allow the hair to dry completely. Unwind them carefully, then separate each curl only as much as needed. Shape the roots with your fingers while leaving the ends alone. Your result will vary with section size and hair texture.
Styling notes:
- Plan your part before making the knots.
- Separate gradually so you can stop at the fullness you like.
- Keep one front curl distinct if you want a soft face-framing detail.
13. Stitch Cornrows Into a Low Braided Ponytail
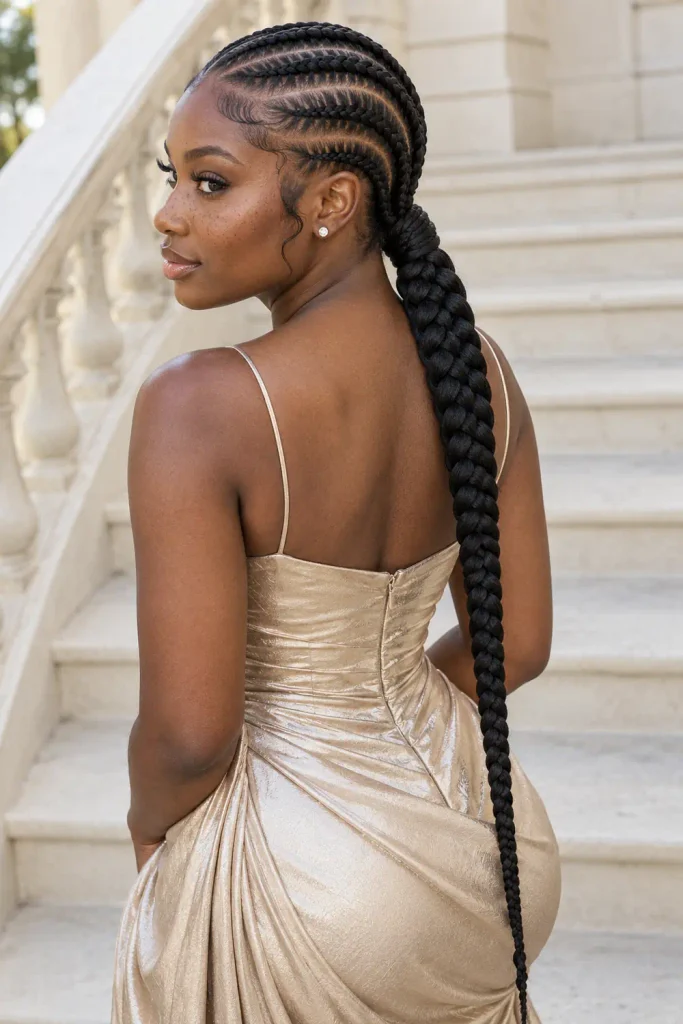
Neat cornrows leading into a low braided ponytail combine a detailed scalp pattern with one simple length at the back. The stitch pattern is the main feature, so accessories can stay minimal.
Bring a reference that shows both the rows and the ponytail. A front-only photo will not explain where you want the braids to meet. Decide on the ponytail length with your stylist, keeping its weight and your dress’s back detail in mind.
Styling notes:
- Keep the gathering point low enough to sit comfortably.
- Wrap the base with a braid or matching hair for a finished edge.
- A shorter ponytail is easier to keep clear of an embellished back.
14. Rounded Afro With Pearl Pins on One Side
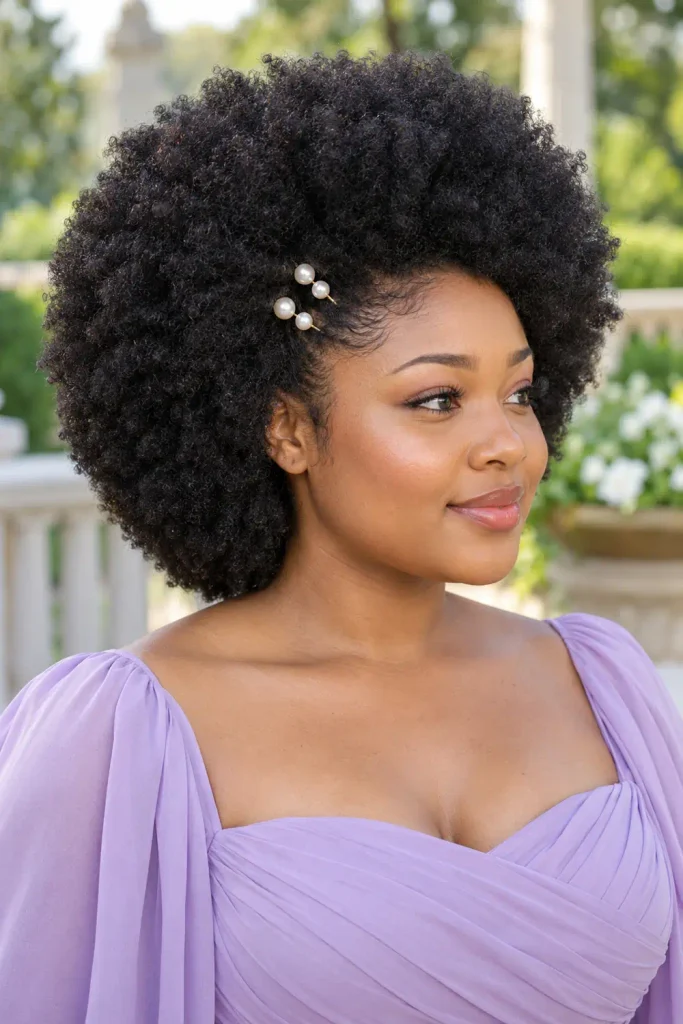
Pearl pins create a small focal point against a rounded afro while leaving the texture visible. A cluster above one ear is enough to connect the hairstyle to a dressy outfit.
Shape the hair gently, checking the outline from the front and sides. You can keep the afro balanced or create slightly more height at the crown. Place pins where they can grip securely without needing to be pushed hard against your scalp.
Styling notes:
- Use a few lightweight pins rather than a heavy clip that pulls downward.
- Keep the cluster on the side you prefer to show in photos.
- Let the rest of the hair stay full instead of flattening it to match the pinned side.
15. Bubble Ponytail With a Wrapped Base
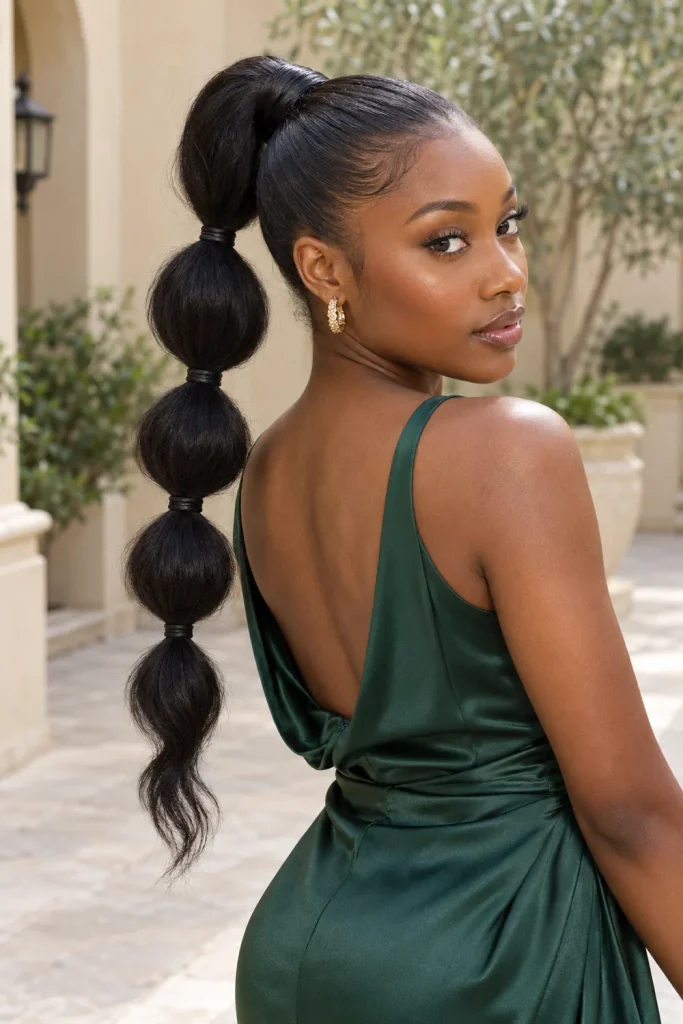
The rounded sections of a bubble ponytail make a simple silhouette look more playful. This style needs enough length to create separate bubbles, either with your own hair or a matched ponytail extension.
Secure the base comfortably, then place small elastics along the length. Gently loosen the hair between them to form each bubble. Work from the top downward and keep checking the overall outline. Uneven spacing can be adjusted before the sections are fully shaped.
Styling notes:
- Wrap a small strand around the base to cover the main tie.
- Make fewer, larger bubbles for a bold shape.
- Leave the final section loose for a softer finish at the ends.
16. Fulani Inspired Braids With Beaded Ends
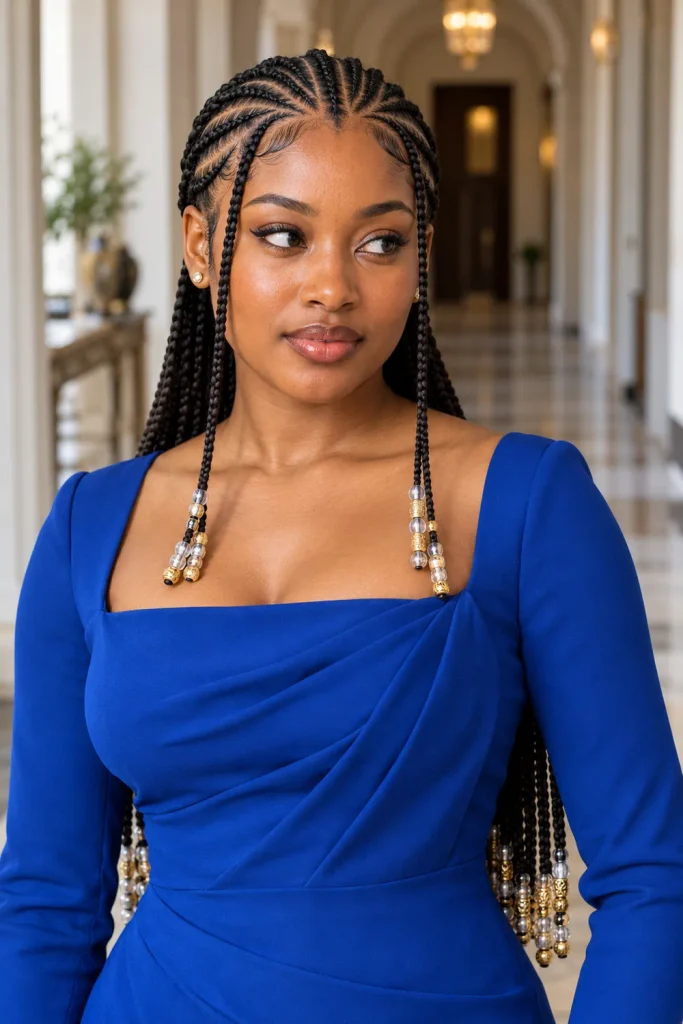
Fulani-inspired braids can combine a central braid, side braids, and beaded details in a distinctive pattern. Show your braider the exact arrangement you like, since styles using this name can vary.
Choose beads alongside your outfit so the finished lengths feel intentional. Clear, gold, or wooden beads each create a different look. You can decorate selected face-framing braids instead of adding beads throughout the whole style. Consider how the ends will sit against your shoulders.
Styling notes:
- Check that face-framing beads do not knock against large earrings.
- Keep bead weight comfortable for the size of each braid.
- Take a side-view reference to show where you want the smaller braids placed.
17. Two Strand Twists Pinned Into a Loose Updo
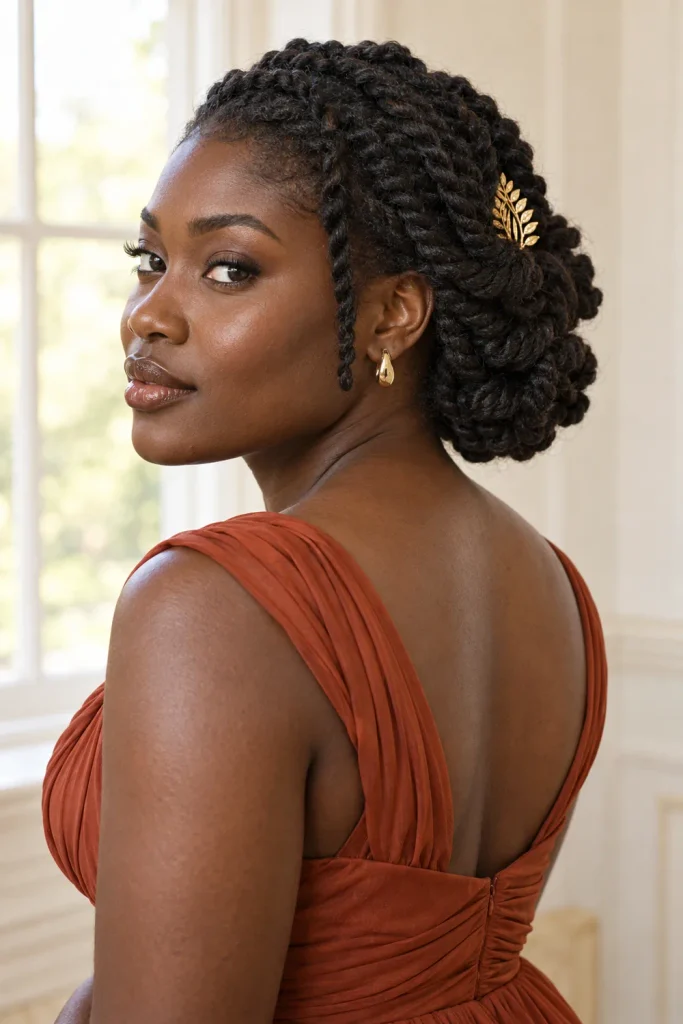
Twists you already wear can become a formal updo with a few changes in placement. Gather them toward the back, then pin small groups into loose loops or folds.
Keep the twist pattern visible instead of pressing everything flat. Leave one or two front twists free if you like a softer frame. The finished shape can sit low, high, or slightly to one side, depending on your length. Take a quick back-view photo to check for loose ends.
Styling notes:
- Use several small support points rather than one tight tie.
- Hide pins inside the folds.
- A simple hair comb can sit above the tucked section without covering the texture.
18. Side Swept Crochet Curls With One Side Pinned
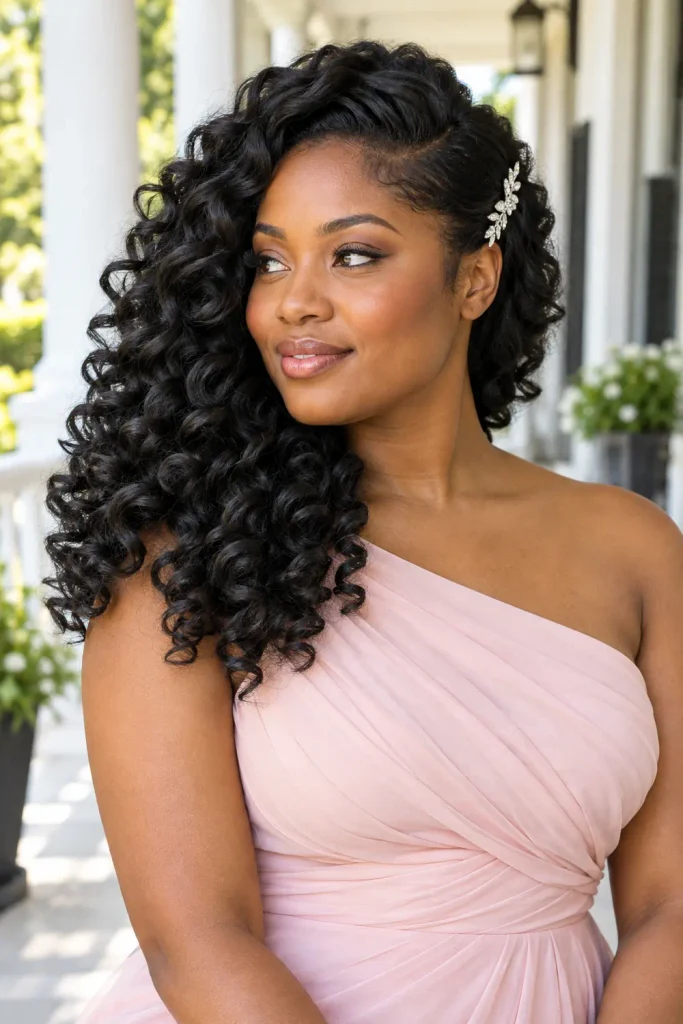
Sweeping crochet curls to one side creates a full outline around one shoulder while opening up the other. The contrast works well with an asymmetric neckline or a single statement earring.
Work with the part and installation you already have. Gather a small section above one ear and pin it back without pulling on the base. Arrange the remaining curls with your fingers. Check the back so the sweep looks finished beyond the front-facing photo.
Styling notes:
- Use the detangling method recommended for your specific crochet hair.
- Keep decorative clips away from exposed attachment points.
- Choose lightweight earrings if curls tend to catch on jewelry.
19. Sculpted Tapered Natural Cut With Defined Coils
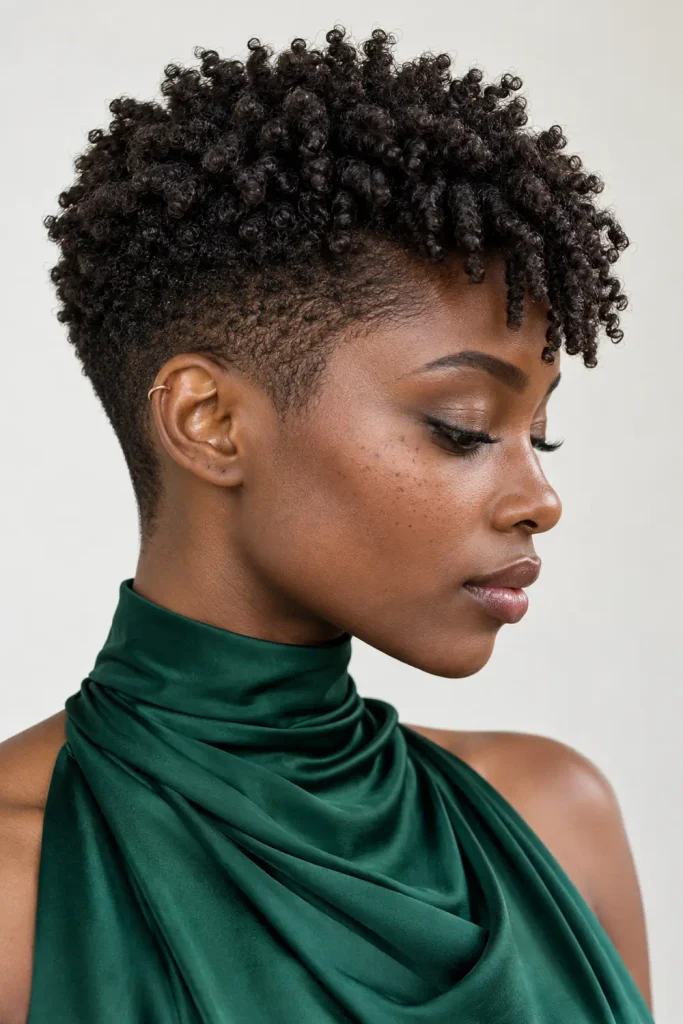
A tapered cut already has a strong outline. Defining the longer coils at the crown makes that shape more visible without adding hair or building an updo.
Use your usual curl product to shape small sections where you want definition. Finger-coil selected pieces rather than forcing every section to look identical. Keep the shorter sides neat and let the crown provide the height. A slightly angled front section can change the look without changing the cut.
Styling notes:
- Style the crown in the direction you want it to sit before it dries.
- Try a small ear cuff or stud so the cut stays the focus.
- If you want a trim, leave time to settle into the shape before the event.
Choosing Your Homecoming Hairstyle
The most useful homecoming hairstyles for Black women work with the hair you have and the evening you want. Choose a shape you like, then check the practical details: how it feels when you move, where it sits against your dress, and whether your earrings catch on it. Bring front, side, and back references if you are booking a stylist. For a style you are doing yourself, practice the parting and pin placement ahead of time. Keep a couple of spare pins nearby, then give yourself room to enjoy the night. Save your favorite ideas to Pinterest before your next styling appointment.
